Monthly Archives: November 2024

embroidery thread color chart pdf

Embroidery thread color charts are essential tools for designers and embroiderers, offering a visual guide to various thread colors and shades. They help in selecting the perfect hues for projects, ensuring color consistency and accuracy. Available in PDF formats, these charts showcase an extensive range of thread types, from viscose rayon to metallic, making color matching effortless and precise for both manual and machine embroidery applications.

Overview of Embroidery Thread Color Charts

Embroidery thread color charts provide a detailed visual representation of available thread shades, enabling precise color selection for embroidery projects. These charts typically include extensive libraries of colors, organized by type, such as viscose rayon, metallic, and specialty threads. Many charts are available in PDF formats, offering convenience for digital access and printing. They often feature color blocks, symbols, or combinations of both, ensuring compatibility with various embroidery techniques. Some charts cater to specific brands, like DMC or Madeira, while others cover general thread types. Whether for hand-stitching or machine embroidery, these charts serve as invaluable resources for achieving consistent and accurate color results, helping embroiderers bring their designs to life with precision and creativity.

Importance of Color Charts in Embroidery

Color charts are indispensable tools in embroidery, ensuring precise color matching and consistency in thread selection. They provide a visual representation of available shades, helping embroiderers make informed decisions. By referencing these charts, designers can avoid color discrepancies and achieve the desired aesthetic. Additionally, color charts save time by streamlining the selection process, allowing embroiderers to focus on creativity. They also facilitate communication between designers and stitchers, ensuring everyone is on the same page. For professional embroiderers, color charts are crucial for maintaining brand consistency and delivering high-quality results. Their availability in PDF formats makes them easily accessible and reusable, further enhancing their utility in both digital and physical embroidery workflows.

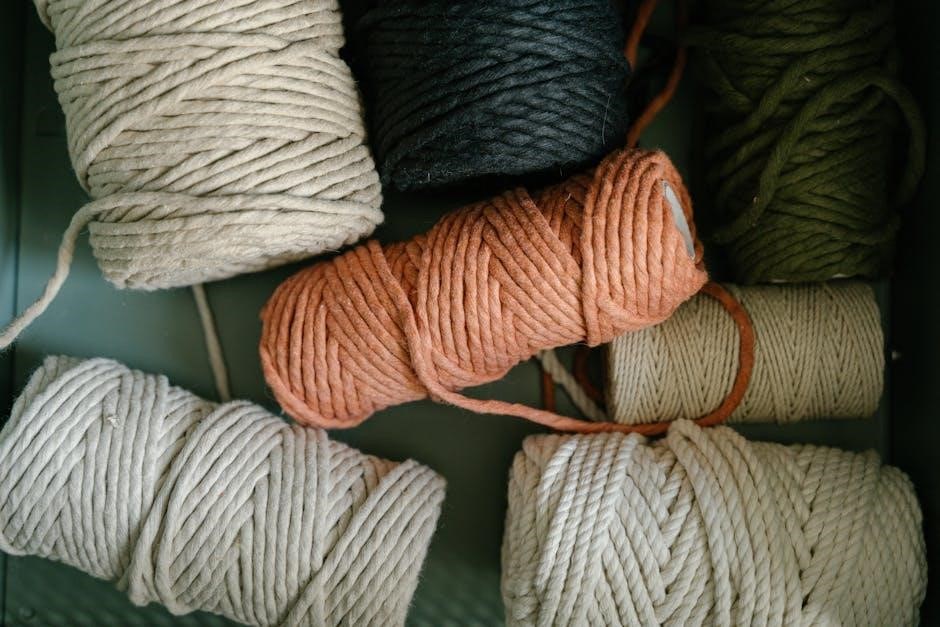
Types of Embroidery Threads and Their Color Varieties

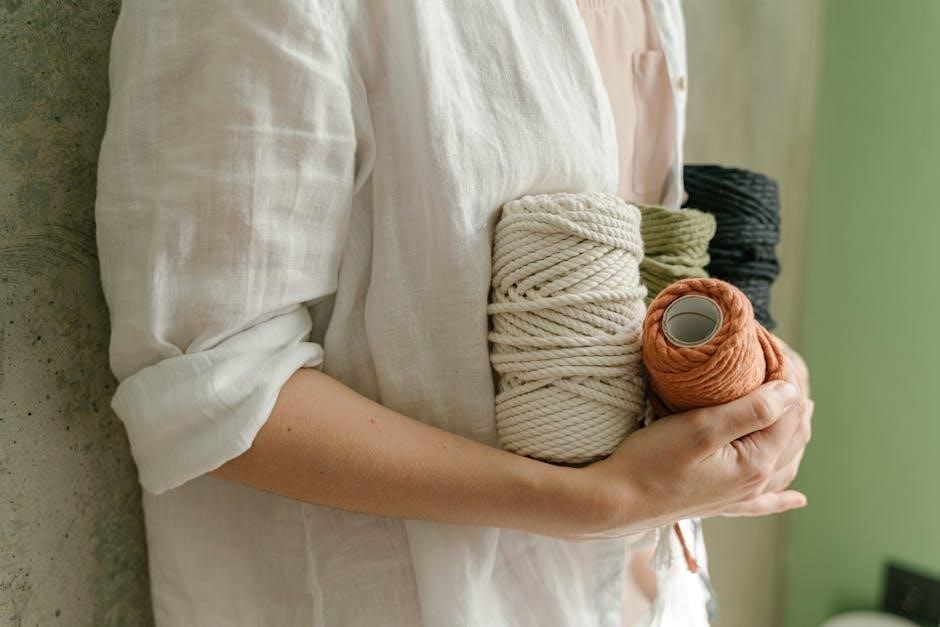
Embroidery threads come in various types like viscose rayon, metallic, and specialty, each offering extensive color options. PDF charts help identify shades and codes for projects.

Viscose Rayon Embroidery Thread Colors

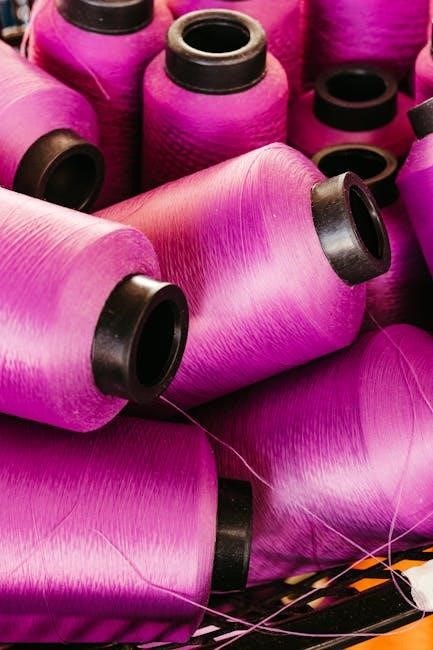
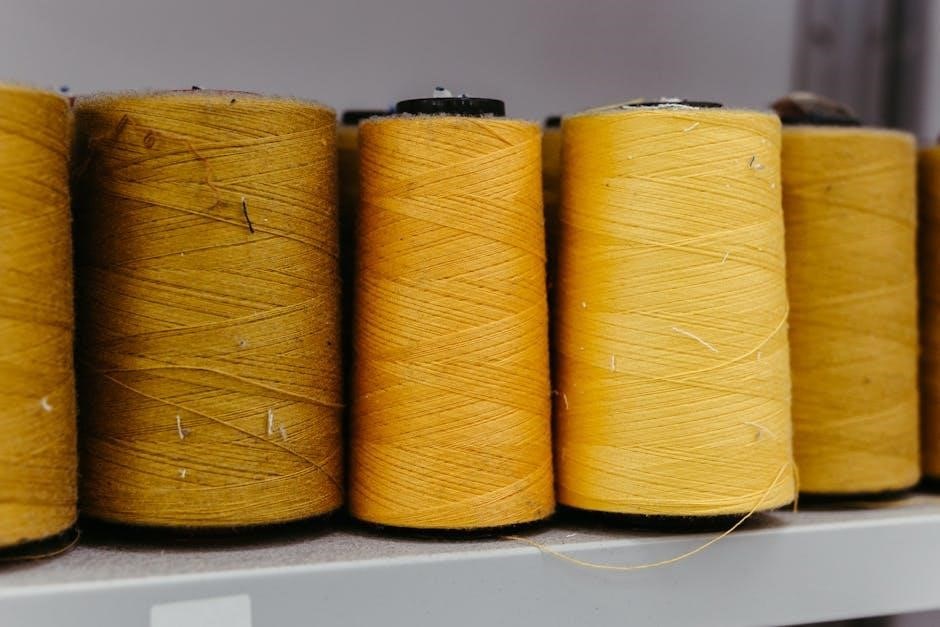
Viscose rayon embroidery threads are widely popular for their vibrant colors and durability. These threads offer a vast spectrum of shades, from soft pastels to bold brights, ensuring versatility for any embroidery project. Known for their excellent color retention and smooth texture, viscose rayon threads are ideal for both hand and machine embroidery. PDF color charts provide detailed representations of these colors, making it easier to match and select the perfect hues for designs. With their high sheen and consistency, viscose rayon threads remain a favorite among embroiderers, offering a professional finish to every stitch.

Metallic and Specialty Embroidery Threads

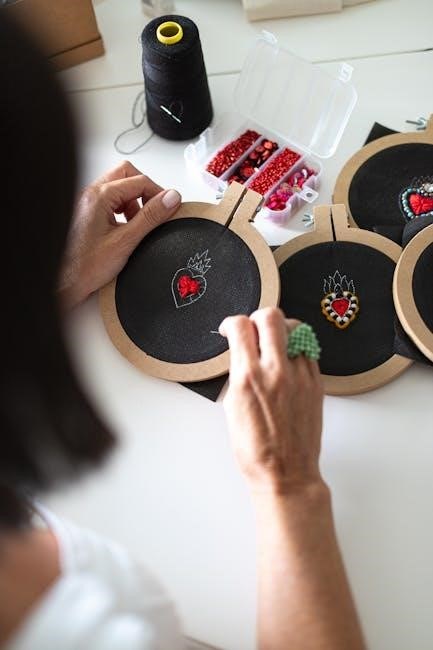
Metallic and specialty embroidery threads add a touch of elegance and uniqueness to embroidery projects. These threads are available in a wide range of shimmering colors, including gold, silver, and holographic effects. PDF color charts provide an accurate representation of these threads, making it easier to choose the perfect shade for intricate designs. Metallic threads are durable and resistant to fading, ensuring long-lasting results. They are ideal for creating decorative elements, such as borders, highlights, and text. Specialty threads, like glow-in-the-dark or neon options, offer additional creative possibilities. These threads are versatile and can be used for both hand and machine embroidery, adding a professional and eye-catching finish to any design.

How to Use an Embroidery Thread Color Chart PDF

Download the PDF and print it on A4 paper for a clear reference. The chart displays thread colors with codes, aiding accurate color selection. Use the visual guide to match hues for embroidery projects, ensuring consistency and precision. Print the chart to avoid screen color discrepancies, and refer to it for choosing the perfect thread shades and types, such as metallic or viscose rayon, to enhance your designs effectively.

Steps to Download and Print the Chart

To use an embroidery thread color chart PDF, start by locating a reliable source online, such as official embroidery thread brands like DMC or Madeira. Download the PDF file, ensuring it includes color blocks, symbol charts, or detailed codes. Print the chart on A4 paper using a high-quality printer for accurate color representation. Adjust printer settings to avoid color distortion. Once printed, review the chart to familiarize yourself with thread color codes and their corresponding hues. This step ensures precision when matching embroidery thread colors to your design. Always verify the chart’s accuracy by comparing it to physical thread samples. Properly printed charts are indispensable for achieving professional embroidery results.

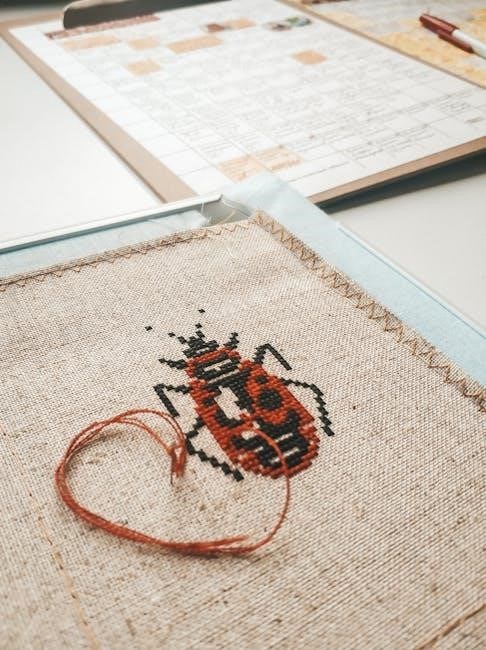
Matching Thread Colors to Your Embroidery Design

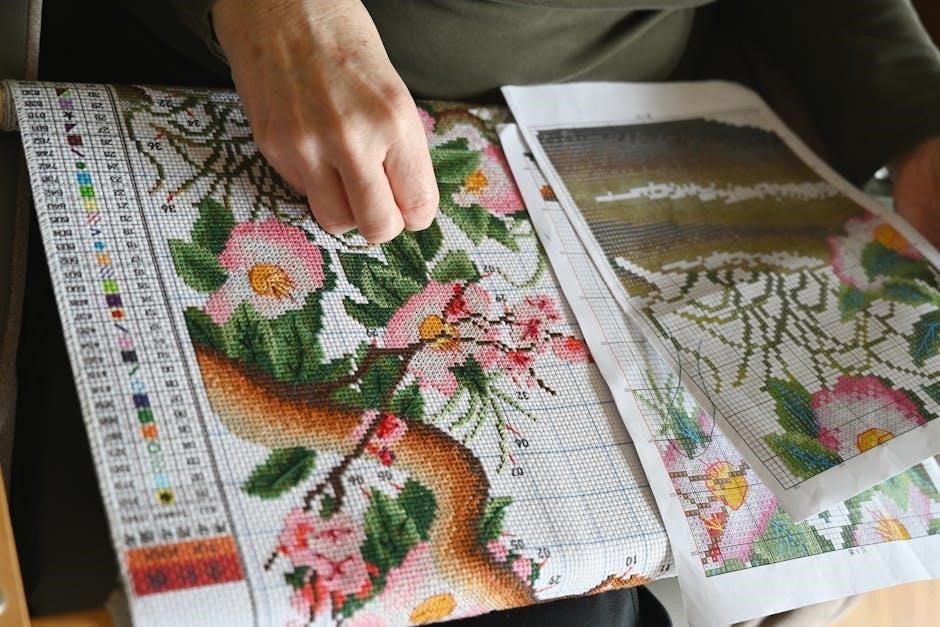
Matching embroidery thread colors to your design ensures a polished and visually appealing result. Use the color chart to cross-reference thread codes with your project’s requirements. Start by identifying the dominant colors in your design and locate their corresponding thread codes on the chart. Consider fabric color and thread finish, as these can affect how colors appear. For accuracy, compare the chart with physical thread samples under natural light to ensure the best match. This process helps maintain consistency and enhances the overall aesthetic of your embroidery work. By carefully selecting threads, you achieve a professional finish that aligns with your creative vision.

Popular Embroidery Thread Brands and Their Color Charts

Leading brands like DMC, Madeira, and Isacord offer comprehensive color charts in PDF formats, featuring vibrant thread collections for embroidery enthusiasts. These charts provide detailed color codes, ensuring precise thread selection for projects.

DMC Embroidery Floss Color Chart

DMC embroidery floss color charts are renowned for their extensive range of vibrant shades, offering over 500 colors to inspire creativity. Available in PDF formats, these charts provide detailed color codes, making it easy to match threads for embroidery projects. The chart includes both classic and modern hues, ensuring versatility for various designs. DMC’s color chart is a go-to resource for embroiderers, featuring a user-friendly layout with color blocks and corresponding codes. It is regularly updated to include new shades, keeping pace with evolving design trends. Whether for cross-stitch, hand embroidery, or machine work, DMC’s color chart is an indispensable tool for achieving precise color matching and professional results.

Madeira and Isacord Thread Color Codes

Madeira embroidery threads are celebrated for their vibrant, color-fast shades, with detailed color codes available in PDF charts. Their extensive range includes over 100 colors, ideal for intricate designs. Isacord threads, popular in commercial embroidery, offer a solid color line with 76 thread color codes, ensuring precise matching. Both brands provide downloadable PDF charts, featuring color blocks and codes for easy reference. These resources are invaluable for embroiderers, aiding in accurate color selection and consistent results. Whether for hand stitching or machine embroidery, Madeira and Isacord color codes are essential tools for achieving professional-grade embroidery outcomes.

Benefits of Using a Digital Embroidery Thread Color Chart

Digital embroidery thread color charts provide convenience, allowing easy access and customization. They offer precise color matching and are space-saving, ideal for modern embroidery projects.

Advantages of PDF Formats for Color Matching

PDF formats for embroidery thread color charts offer exceptional versatility and convenience. They provide clear, high-quality visual representations of thread colors, ensuring accuracy in color matching. PDF charts are easily downloadable, printable, and accessible on various devices, making them ideal for both home and professional use. Many PDF charts include multiple views, such as color blocks, symbol charts, or combined layouts, catering to diverse needs. Additionally, PDFs can be zoomed in for detailed color examination, reducing errors in thread selection. Their digital nature also allows for easy updates and sharing, making them a practical choice for embroiderers seeking precise and efficient color matching solutions.

Customizing and Adjusting Colors for Your Projects

Digital embroidery thread color charts offer unparalleled flexibility, allowing embroiderers to customize and adjust colors seamlessly. With PDF formats, users can easily manipulate and mix colors to suit their creative vision. The ability to zoom in on color swatches ensures precise matching, while the option to print charts on A4 paper provides a tangible reference. Many charts include multiple variations, such as symbol-only or color-block layouts, enabling embroiderers to tailor their approach. Additionally, digital tools allow for experimentation with different shades and combinations, making it easier to achieve unique and personalized designs. This adaptability is particularly valuable for intricate or custom embroidery projects, where exact color coordination is crucial for the desired aesthetic.

Embroidery thread color charts are indispensable resources for both novice and experienced embroiderers, providing a comprehensive guide to thread colors and shades. Available in PDF formats, these charts simplify color selection, ensuring accuracy and consistency in embroidery projects. They cater to diverse needs, from viscose rayon to metallic threads, and offer customizable options for unique designs. Popular brands like DMC, Madeira, and Isacord provide detailed color codes, making it easier to match threads to designs. Digital charts also allow for adjustments and experimentation, enhancing creativity. Whether for hand or machine embroidery, these tools empower embroiderers to achieve professional results. Embrace the convenience and versatility of embroidery thread color charts to elevate your stitching projects.

bagel bites cooking instructions 12

Cooking Bagel Bites is a quick and delicious process. Whether you prefer a crispy finish or a softer texture, these bite-sized snacks offer versatility. Perfect for any occasion, Bagel Bites are easy to prepare using an oven, microwave, or air fryer, ensuring a satisfying snack every time. This guide will walk you through the best methods and tips for achieving perfectly cooked Bagel Bites at home.

What Are Bagel Bites?

Bagel Bites are bite-sized snacks made from mini bagels topped with ingredients like cheese, pepperoni, and sausage. They are designed for quick and easy cooking, offering a convenient snack option. These small, round treats combine the flavors of pizza and bagels, making them a favorite for both kids and adults. Available in various flavors, Bagel Bites are typically frozen and can be cooked in an oven, microwave, or air fryer. Their compact size and delicious taste make them perfect for parties, movie nights, or as a quick snack. Bagel Bites are a popular choice for their simplicity and versatility, providing a satisfying crunch and flavorful experience in every bite.

Why Bagel Bites Are a Popular Snack Choice

Bagel Bites are a beloved snack due to their ease of preparation and delicious taste. Their compact size and flavorful combinations, such as cheese and pepperoni, make them a hit with both kids and adults. The convenience of cooking them in an oven, microwave, or air fryer adds to their appeal, as they require minimal effort and time. Additionally, their versatility allows them to be enjoyed as a quick snack, party appetizer, or even as part of a meal. The combination of crispy exterior and soft interior, along with their savory toppings, creates a satisfying experience that keeps people coming back for more.

Cooking Methods for Bagel Bites

Bagel Bites can be cooked in an oven, microwave, or air fryer. Preheat the oven to 425°F for 12-14 minutes, microwave for 3 minutes, or air fry at 400°F for 10 minutes. Each method ensures crispy, flavorful results, making them a perfect snack.

Oven Cooking Instructions

Preheat your oven to 425°F (220°C). Arrange 12 frozen Bagel Bites about 1/2 inch apart on a baking sheet or shallow pan. Place the baking sheet on the upper middle rack. Bake for 12-14 minutes until golden brown. Let them stand for 1 minute before serving for the best texture; This method ensures a crispy exterior and soft interior. For a crisper texture, bake at 450°F for 10-12 minutes. Always follow these steps for perfectly cooked Bagel Bites every time. This traditional cooking method is a favorite for achieving that classic flavor and texture. Enjoy your perfectly oven-cooked Bagel Bites!

Microwave Cooking Instructions

To cook 12 Bagel Bites in the microwave, place them on a microwave-safe plate. Cook on high power for 3 minutes and 15 seconds. Let them stand for 1 minute before serving. For softer bites, this method is ideal. Ensure the microwave is set to 1100 watts for accurate cooking time. Avoid using a crisping tray, as it may not be necessary. This quick method provides a convenient way to enjoy your Bagel Bites with minimal effort. Perfect for a fast snack, microwave cooking delivers soft and delicious results every time. Follow these steps for perfectly cooked Bagel Bites in the microwave.

Air Fryer Cooking Instructions

Cooking Bagel Bites in an air fryer is a fantastic way to achieve a crispy texture with minimal effort. Preheat the air fryer to 400°F (200°C). Place 12 frozen Bagel Bites in a single layer in the air fryer basket, ensuring they are not overcrowded. Cook for 12-14 minutes, shaking the basket halfway through to ensure even cooking. The result will be golden, crispy Bagel Bites with a delicious finish. This method is quicker than the oven and requires less oil, making it a healthier alternative. Once cooked, let them cool for a minute before serving. The air fryer delivers perfectly crispy Bagel Bites every time, making it a top choice for many snack lovers.

Toaster Oven Cooking Instructions

For a crispy and evenly cooked result, preheat your toaster oven to 425°F (220°C). Arrange 12 frozen Bagel Bites about 1/2 inch apart on a baking sheet or shallow pan. Place the baking sheet on the upper middle rack of the toaster oven. Bake for 12-14 minutes, or until golden brown. Allow the Bagel Bites to stand for 1 minute before serving. This method ensures a perfect balance of crunch and flavor; For optimal results, avoid overcrowding the pan and keep an eye on them during the last few minutes of cooking to prevent over-browning. The toaster oven delivers a crispy finish that’s hard to resist!

Storage and Safety Tips

Store Bagel Bites frozen until ready to cook. Keep them at 0°F (-18°C) or below for optimal freshness. Always follow safe food handling practices to prevent contamination.

Proper Freezing and Thawing Instructions

Bagel Bites should be stored in the freezer at 0°F (-18°C) or below to maintain freshness. Keep them frozen until you’re ready to cook, as thawing can affect texture. For thawing, place the desired number of Bagel Bites in the refrigerator overnight. Avoid leaving them at room temperature for extended periods, as this can lead to degradation. Never refreeze Bagel Bites once thawed. Always cook from a frozen state for the best results, as cooking thawed bites can result in a softer texture. Proper freezing and thawing techniques ensure your Bagel Bites remain crispy and flavorful when cooked.

  • Store at 0°F (-18°C) or below.
  • Thaw in the refrigerator if needed.
  • Cook from frozen for optimal texture.
  • Avoid refreezing after thawing.

Food Safety Guidelines

When cooking Bagel Bites, ensure they reach an internal temperature of at least 165°F (74°C) for food safety. Always handle frozen Bagel Bites with clean hands or utensils to prevent contamination. After cooking, let them stand for 1-2 minutes before serving, as they may be hot and can cause burns. Store any leftovers in an airtight container in the refrigerator and consume within 24 hours. Keep raw or frozen products separate from ready-to-eat foods. If you have allergies, note that Bagel Bites contain wheat and milk. Follow proper hygiene practices during preparation and cooking to enjoy a safe and delicious snack.

  • Cook to an internal temperature of 165°F (74°C).
  • Handle frozen bites safely to avoid contamination.
  • Allow cooked bites to cool briefly before serving.
  • Store leftovers properly in the refrigerator.
  • Be aware of allergens like wheat and milk.

Nutritional Information and Serving Suggestions

A serving of 12 Bagel Bites contains 400 calories, with 12g of fat, 46g of carbs, and 12g of protein. Pair with marinara sauce for flavor or a side salad for a balanced snack.

Nutrition Facts for 12 Bagel Bites

A serving of 12 Bagel Bites contains 400 calories, with 12g of fat, 46g of carbohydrates, and 12g of protein. They also include 800mg of sodium and 10g of sugar. These bites are a good source of calcium and iron but are high in saturated fat and sodium. Pepperoni Bagel Bites contain wheat and milk, making them unsuitable for those with gluten intolerance or dairy allergies. For a balanced snack, consider pairing them with a side salad or marinara sauce for added flavor. Keep in mind that portion control is key, as they are calorie-dense and best enjoyed in moderation as part of a varied diet.

Recommended Serving Size and Pairing Ideas

The suggested serving size for Bagel Bites is 4 pieces (88g), making them a perfect snack for individuals or a shareable treat for small groups. For a well-rounded meal, pair them with a side of marinara sauce or garlic butter for dipping. You can also serve them alongside a fresh green salad or fruit for a balanced option. Additionally, they pair wonderfully with a warm bowl of tomato soup or as a complement to a charcuterie board. For a family of four, consider cooking 12 Bagel Bites and pairing them with a side of roasted vegetables or a light pasta dish for a satisfying meal. Enjoy them as a quick snack or as part of a casual gathering.

Cooking Bagel Bites is simple and versatile, offering crispy or soft results. Whether baked, microwaved, or air-fried, they’re perfect for any snack or meal. Enjoy experimenting with these easy methods!

Final Tips for Perfect Bagel Bites

To achieve the best results, always preheat your oven or air fryer before cooking. Arrange Bagel Bites evenly on a baking sheet, leaving space for even cooking. Bake at 425°F for 12-14 minutes or until golden brown. For crispier bites, cook in the air fryer at 400°F for 10-12 minutes. Let them cool briefly before serving to prevent sogginess. For softer bites, microwave according to package instructions. Experiment with seasonings like garlic powder or herbs for extra flavor. Store leftovers in an airtight container and reheat as needed. Follow these tips for perfectly cooked Bagel Bites every time!

forest lawn glendale map pdf

Forest Lawn Glendale Map PDF: An Overview

The Forest Lawn Glendale Map PDF provides a detailed guide to the park’s layout, featuring gardens, mausoleums, and chapels. It aids visitors in navigating the serene grounds, ensuring a peaceful experience.

Forest Lawn Memorial-Park, located at 1712 S. Glendale Avenue in Glendale, California, is a historic cemetery renowned for its meticulously maintained gardens, grand mausoleums, and serene walking paths. Established in 1906, it has become a significant cultural and historical landmark, offering a peaceful setting for reflection and remembrance. The park is also celebrated for its stunning art and architecture, showcasing a blend of tranquility and beauty. Visitors can explore various sections, including the Gardens of Memory and the Eternity Chapel, which provide solace and a connection to loved ones. With its picturesque landscapes and historic significance, Forest Lawn Memorial-Park serves as both a final resting place and a destination for those seeking solace and inspiration. The availability of a detailed map, such as the Forest Lawn Glendale Map PDF, ensures that visitors can navigate the expansive grounds with ease.

Historical Significance of the Map

The Forest Lawn Glendale Map PDF holds significant historical value, offering insights into the park’s evolution and cultural importance. Since its establishment in 1906, Forest Lawn has served as a resting place for numerous notable figures, making it a site of historical interest. The map details the locations of iconic structures like the Great Mausoleum and the Memorial Chapel, which are architectural marvels. It also highlights various gardens and sections dedicated to specific themes or communities, reflecting the park’s diverse history. By providing a visual representation of the park’s layout, the map aids visitors in exploring these historical landmarks. Additionally, the map serves as a resource for genealogists and historians researching the lives of those interred at Forest Lawn. Its availability in PDF format ensures that this historical information is accessible to a wider audience, preserving the park’s legacy for future generations.

Downloading the Forest Lawn Glendale Map

Visitors can easily download the Forest Lawn Glendale Map PDF from the official website or through the Forest Lawn app. The map provides detailed layouts of gardens, mausoleums, and chapels, ensuring easy navigation and planning for visits.

Step-by-Step Guide to Accessing the PDF

To access the Forest Lawn Glendale Map PDF, visit the official Forest Lawn website at ForestLawn.com. Navigate to the “Maps & Directions” section. Select “Forest Lawn Glendale” from the location options. Click on the “Download Map” button to retrieve the PDF. The map is also available through the Forest Lawn app, which can be downloaded from the Apple App Store or Google Play Store. Once installed, open the app and scan the provided QR code for direct access to the PDF. This guide ensures a seamless experience for visitors to plan their trips efficiently and explore the park’s historic sites, gardens, and memorials with ease.

Features of the Digital Map

The Forest Lawn Glendale Map PDF offers a comprehensive and user-friendly guide to the park. It includes detailed illustrations of the park’s layout, highlighting key locations such as mausoleums, chapels, and memorial gardens. The map features color-coded sections for easy navigation, ensuring visitors can quickly locate specific areas of interest. Additionally, the PDF includes a legend that explains the various symbols and markings used throughout the map, making it easier to understand and utilize. The digital format allows for zooming in and out, providing clear views of even the smallest details. This feature is particularly useful for planning visits and identifying the best routes to take. The map also includes information about parking areas, restrooms, and other essential facilities, ensuring a convenient experience for all visitors.

Key Locations Highlighted on the Map

The map emphasizes major sites like the Great Mausoleum, Chapel of the Pines, and the Courts of Honor, guiding visitors to notable memorials and scenic areas efficiently.

Mausoleums and Chapels

Forest Lawn Glendale is renowned for its grand mausoleums and chapels, which are central to its historical and cultural significance. The Great Mausoleum, a stunning example of architectural excellence, features intricate designs and serves as a final resting place for many. Chapels like the Eternity Chapel and the Little Chapel of the Flowers offer serene spaces for reflection and ceremonies. These structures are not only functional but also showcase the park’s commitment to beauty and tranquility. The map provides clear markings for these locations, ensuring visitors can easily locate them. Each mausoleum and chapel is uniquely designed, reflecting diverse architectural styles and catering to various cultural and religious needs. By highlighting these landmarks, the map helps visitors navigate and appreciate the park’s rich heritage and peaceful ambiance.

Gardens and Memorial Sections

Forest Lawn Glendale is celebrated for its meticulously maintained gardens and memorial sections, which provide a tranquil atmosphere for remembrance. The map highlights various gardens, such as the Gardens of Memory and the Children’s Garden, each designed to offer solace and beauty. Memorial sections are carefully organized, with distinct areas for different burial options, including lawn crypts and cremation niches. The gardens are adorned with vibrant flora, walking paths, and serene spaces for reflection. These areas are not only peaceful but also serve as a tribute to loved ones. The map ensures visitors can locate these sections effortlessly, allowing them to explore the park’s natural beauty and historical significance. Whether for quiet contemplation or paying respects, the gardens and memorial sections are central to the Forest Lawn experience, creating a harmonious blend of nature and remembrance.

Using the Map for Navigation

The map simplifies navigating Forest Lawn Glendale, with clear symbols and color codes for chapels, mausoleums, and gardens. It helps visitors locate specific sections and plan their route efficiently.

Understanding the Layout and Symbols

The Forest Lawn Glendale Map PDF features a well-organized layout with clear symbols and color codes to distinguish different areas. Chapel locations are marked with white lines, while mausoleums are highlighted in yellow. Gardens and memorial sections are labeled with distinct icons, making it easy to identify specific areas. The map also includes walking paths, ensuring visitors can navigate smoothly. Symbols are explained in a legend, helping users interpret the markings. Key locations like the Children’s Garden and Eternity Chapel are prominently displayed. This structured design allows visitors to locate graves, memorials, and significant landmarks efficiently. By understanding the symbols and layout, visitors can plan their route and explore the park’s serene beauty without confusion.

Plan Your Visit with the Map Guide

The Forest Lawn Glendale Map PDF is an essential tool for planning a seamless and meaningful visit. By reviewing the map beforehand, visitors can identify key locations, such as chapels, mausoleums, and memorial gardens, ensuring they don’t miss important sites. The map’s color-coded layout and symbols help visitors navigate the expansive grounds efficiently. Marked pathways guide visitors through serene walking routes, while labels highlight areas of historical or aesthetic significance. The map also assists in locating specific graves or memorials, saving time and reducing confusion. Whether visiting for reflection, exploration, or attending a service, the map guide enhances the overall experience, allowing visitors to focus on the beauty and tranquility of the park. It’s a valuable resource for both first-time and returning visitors.

tailor gw2 guide

Tailoring is a versatile crafting discipline in Guild Wars 2 that produces light armor for scholars, including elementalists, mesmers, and necromancers. It also crafts essential items like runes, relics, and inventory bags, making it a valuable skill for both combat and convenience. Tailoring requires the use of crafting stations and specific materials, making it accessible to players looking to enhance their gear and support their gameplay.

1.1 What is Tailoring in GW2?

Tailoring in Guild Wars 2 is a crafting discipline that specializes in creating light armor, runes, relics, and inventory bags. It serves scholars like elementalists, mesmers, and necromancers, providing gear tailored to their unique needs. Tailors use refinement and crafting components to produce items, with access to crafting stations across Tyria.

1.2 Importance of Tailoring for Light Armor Professions

Tailoring is crucial for light armor professions, including elementalists, mesmers, and necromancers, as it provides them with essential gear for survival and combat effectiveness. Tailors craft armor sets, runes, and relics, enhancing attributes and abilities, making it a cornerstone of their progression and success in Guild Wars 2.

1.3 Basic Requirements to Become a Tailor

To become a tailor in Guild Wars 2, visit a tailor NPC or use a crafting station to learn the discipline. Start with basic materials like cloth and leather, and refine them for crafting. Swapping to tailoring costs 10 gold per level already attained in the target discipline.

Benefits of Tailoring in Guild Wars 2

Tailoring offers numerous benefits, including crafting light armor for scholars, creating inventory bags, and producing runes and relics. It enhances gameplay by providing essential gear and convenience items, making it a valuable skill for players seeking to optimize their characters and inventory management.

2.1 Crafting Light Armor for Scholars

Tailoring is essential for crafting light armor tailored to scholars, including elementalists, mesmers, and necromancers. Using refined materials like cloth and leather, tailors create armor pieces that enhance mobility and magical abilities. This discipline also allows for crafting runes and insignias, enabling customization of armor attributes to suit specific playstyles and class requirements effectively.

2.2 Creating Inventory Bags and Runes

Tailors can craft inventory bags to expand storage space and organize items efficiently. Additionally, they create runes, which are essential upgrades for armor, enhancing its attributes. Crafting these items requires specific materials and recipes, offering players convenience and customization for their characters and gameplay experience in Guild Wars 2.

2.3 Crafting Relics and Other Equipment

Tailors craft relics, which provide unique bonuses and effects, enhancing character abilities. They also create other equipment, such as back items and accessories, offering versatility in customization. These items require specific materials and recipes, making tailoring a diverse and valuable skill for character progression and optimization in Guild Wars 2.

The Tailoring Crafting Process

Tailoring involves refining raw materials, combining components, and using crafting stations to create light armor, runes, and other items. It requires skill progression and resource management.

3.1 Understanding Refinement and Crafting Components

Refinement transforms raw materials like cloth and leather into usable forms for crafting. Crafting components, such as insignias and runes, are combined to create armor and other items. Understanding these processes is key to producing high-quality gear and maximizing efficiency in Tailoring.

3.2 Using Crafting Stations and NPCs

Crafting stations, found throughout the game world, are essential for Tailoring. Players must interact with these stations to craft items. NPCs near these stations sell materials and recipes, aiding in the crafting process. Utilizing these resources effectively is crucial for advancing your Tailoring skills and creating gear efficiently.

3.3 Discovering Recipes and Armor Variations

Tailors can discover various armor recipes and variations by experimenting with materials and components. Each armor piece can vary in stats, rarity, and appearance. Crafting Satchels of Armor offers a convenient way to create full sets, using the same materials as individual pieces. These recipes can also be discovered or purchased, enhancing customization options.

Leveling Up Your Tailoring Skills

Start with Jute and Rawhide Leather, progressing to Wool at level 75. Use the discovery tab to unlock new recipes and expand your crafting capabilities efficiently.

4;1 Starting with Jute and Rawhide Leather

Begin your tailoring journey by crafting items with Jute and Rawhide Leather. These materials are readily available and inexpensive, perfect for leveling up your skills. At level 75, transition to Wool for more advanced recipes, ensuring a smooth progression in your crafting journey.

4.2 Advanced Materials for Higher Levels

As you progress, advanced materials like Silk, Linen, and Gossamer become essential for crafting superior light armor and equipment. These materials are crucial for creating high-tier gear, ensuring your tailoring skills remains relevant and effective for scholars and other professions in Guild Wars 2.

4.3 Efficient Use of Resources and Time

Optimize your tailoring progress by planning crafting sessions and buying materials in bulk from the Trading Post. Focus on crafting items with high demand to minimize waste and maximize efficiency. Use daily crafting bonuses wisely to save time and resources while leveling your tailoring skills effectively.

Crafting Equipment and Accessories

Tailors can craft light armor sets, runes, and relics, enhancing scholar professions. Additionally, they create inventory bags for convenience, making tailoring a versatile craft for both combat and storage needs.

5.1 Making Light Armor Sets for Specific Professions

Tailors craft light armor tailored to specific professions, such as elementalists, mesmers, and necromancers. Each set requires unique materials like cloth, leather, and refinement components, ensuring the armor meets the profession’s attribute needs. Crafting varies by tier, from basic jute to advanced materials, allowing for customization and stat optimization.

5.2 Crafting Satchels of Armor for Convenience

Tailors can craft satchels containing full armor sets, offering convenience for equipping multiple pieces at once. These satchels use the same materials as individual armor crafting, making them efficient for players needing quick access to complete sets without managing separate items.

5.3 Creating Insignias for Custom Attributes

Insignias are crafted components that determine the attributes of armor. Tailors can create various insignias using specific materials, with recipes discoverable at each tier. These insignias allow for customization of armor stats, making them essential for tailors aiming to craft gear with specific attribute combinations for different playstyles and professions.

Materials and Resources for Tailoring

Tailoring requires cloth and leather materials, gathered from nodes or looted from enemies. Refinement transforms raw materials into usable components, while crafting stations and NPCs aid in acquiring supplies for armor and accessories.

6.1 Gathering Cloth and Leather Materials

Tailors gather cloth and leather from nodes or enemies, starting with jute and rawhide leather. Using tools like sickles or axes ensures efficient material collection, crucial for crafting armor and accessories. Higher-tier materials like silk or heavy leather are needed for advanced crafting, supporting scholars and other professions effectively.

6.2 Refining Raw Materials for Crafting

Refining raw materials transforms them into usable forms for tailoring. Jute becomes jute scraps, refined into bolts of cloth, while leather is processed into usable hides. This step is crucial for crafting armor and accessories, ensuring materials meet the quality needed for higher-tier recipes and gear.

6.3 Managing Inventory Space and Storage

Efficient inventory management is vital for tailors, as crafting requires ample space for materials and crafted items. Use bank slots, shared inventory, and crafting bags to organize supplies. Regularly refine raw materials to reduce bulk and prioritize essential items to maintain a balanced and functional storage system while crafting.

Economy and Crafting in Guild Wars 2

The economy in Guild Wars 2 revolves around the Trading Post for buying and selling crafted items. Tailors can profit by crafting high-demand items like bags and armor, using cost-effective strategies to minimize expenses and maximize returns through efficient crafting and market analysis.

7.1 Buying and Selling on the Trading Post

The Trading Post is Guild Wars 2’s marketplace for buying and selling items. Tailors can purchase materials or crafted goods, while selling their creations for gold. Using buy orders to acquire cheap materials and listing items at competitive prices maximizes profitability, especially for high-demand items like bags and armor sets.

7.2 Cost-Effective Crafting Strategies

To craft efficiently, focus on buying materials from vendors or using buy orders for cheaper components. Plan crafting sessions to minimize waste and optimize resource use. Prioritize refining raw materials and avoid unnecessary expenses to reduce overall costs while progressing your tailoring skills effectively.

7.3 Making Profit from Tailoring

Craft high-demand items like runes, bags, and light armor to sell on the Trading Post. Analyze market trends to identify profitable recipes and timing. Consider crafting ascended gear or using the Mystic Forge for rare items to maximize returns and grow your in-game gold reserves effectively.

Advanced Tailoring Techniques

Master crafting ascended armor, utilize the Mystic Forge for unique recipes, and refine your skills in creating rare items. Experiment with advanced materials and techniques to craft exceptional gear.

8.1 Crafting Ascended and Illustrious Armor

Ascended armor requires master tailoring skills, combining refined materials with ascended insignias. Crafting illustrious armor involves rare components like Mystic Crystals and Elonian Wine. These high-tier armors offer enhanced attributes and unique appearances, making them invaluable for endgame content. Recipes can be discovered or purchased from master tailors.

8.2 Using the Mystic Forge for Special Recipes

The Mystic Forge allows tailors to craft unique items by combining materials like Mystic Crystals, Coins, and Elonian Wine. This process can create rare armor sets and recipe sheets for special gear, offering customization and power for high-level play. Experimentation is key to unlocking its full potential.

8.3 Mastering the Art of Crafting Gifts

At Master rank, tailors can craft gifts used in the Mystic Forge to create special weapons. These gifts are made by combining crafted armor, Mystic Crystals, Mystic Coins, and Bottles of Elonian Wine, offering unique customization options for advanced players.

Tips for New Tailors

Start with basic materials like jute and rawhide leather to craft simple items. Avoid wasting resources by planning recipes in advance and manage your inventory wisely always.

9.1 Starting with Basic Recipes and Materials

Begin with jute and rawhide leather to craft simple armor pieces. Use the discovery tab to unlock new recipes and experiment with materials. Start small to minimize waste and gradually progress to more complex items as your skills improve over time.

9.2 Avoiding Common Mistakes in Crafting

Avoid wasting materials by planning recipes in advance. Manage inventory space wisely to prevent clutter. Don’t craft items individually—use satchels for full sets. Refine materials efficiently and double-check requirements before starting. These tips help minimize errors and optimize your tailoring progress effectively.

9.3 Staying Updated with Game Changes

Regularly check ArenaNet’s official updates and patch notes for changes affecting tailoring. Join forums and Discord communities for real-time discussions. Adapt strategies to new material requirements or recipe updates. Stay informed to maintain efficiency and effectiveness in your crafting journey, ensuring you’re always up-to-date with the latest improvements and adjustments.

Maximizing Inventory Space

Crafting bags and satchels through tailoring helps expand your inventory. Organize materials efficiently by prioritizing essentials and discarding duplicates. Regularly clean up your storage to save space and streamline your crafting process.

10.1 Crafting Bags for Inventory Expansion

Crafting bags is a practical way to expand your inventory. Tailors can create various bag sizes, from small to large, using cloth and leather materials. Upgrading your bags increases storage capacity, allowing you to carry more items and better organize your equipment and crafting supplies while exploring Tyria.

10.2 Using Satchels and Other Storage Solutions

Satchels provide a convenient way to store armor sets, crafted with materials like cloth and leather. They save inventory space by containing full armor sets, making them ideal for scholars. Additionally, other storage solutions like boxes and chests can help organize crafting materials and gear efficiently for easier access during gameplay.

10.3 Organizing Your Crafting Materials

Organizing your crafting materials is essential for efficiency. Use bank slots and material storage to keep items tidy. Sort materials by rarity and type to quickly locate what you need. This system prevents waste and saves time, ensuring your tailoring process remains smooth and productive.

Tailoring for Specific Professions

Tailoring in Guild Wars 2 is tailored for scholars, including elementalists, mesmers, and necromancers. Each profession benefits from custom light armor, runes, and insignias, enhancing their unique abilities and playstyles through crafted gear.

11.1 Tailoring for Elementalists

Tailoring for elementalists focuses on crafting light armor that enhances their elemental abilities. Pieces like gloves and boots can increase energy regeneration and elemental damage. Tailors can create armor with specific prefixes, such as “Magical” or “Elemental,” to boost elementalists’ spellcasting efficiency and survivability in both PvE and PvP scenarios.

11.2 Tailoring for Mesmers

Tailoring for mesmers revolves around creating light armor that complements their illusion and deception playstyle. Armor crafted with “Illusion” or “Mesmer” prefixes enhances spellcasting, initiative, and confusion effects. Tailors can craft sets that boost mesmers’ ability to control and manipulate the battlefield, making them more formidable in combat situations.

11.3 Tailoring for Necromancers

Tailoring for necromancers focuses on crafting light armor that enhances their dark magic and survivability. Armor with “Carrion” or “Viper” prefixes boosts poison and condition damage, while ” Celestial” enhances spellcasting. Tailors can craft gear that supports minion mastery and life force management, making necromancers more formidable in combat scenarios.

Tailoring in Guild Wars 2 offers a rewarding and creative way to enhance gameplay. Mastering this craft provides both utility and satisfaction, making it a valuable skill for any player.

12.1 The Future of Tailoring in GW2

Tailoring in Guild Wars 2 continues to evolve with new expansions, offering fresh recipes and materials. ArenaNet’s updates ensure the craft remains relevant, with potential for new armor tiers and improved crafting efficiency, keeping tailors engaged and essential to the game’s economy and character progression.

12.2 Encouragement for Aspiring Tailors

Embarking on tailoring in Guild Wars 2 is a rewarding journey, offering both creative expression and practical benefits. Starting is easy, and the craft grows increasingly fulfilling as you progress. Tailoring provides essential gear for scholars and valuable items for all players, making it a worthwhile skill to pursue with dedication and enjoyment.

12.3 Final Tips for Mastery

To master tailoring, focus on efficient resource use, discovering high-tier recipes, and experimenting with the Mystic Forge for unique items. Stay updated with game changes, optimize your crafting schedule, and explore advanced techniques to maximize your progress and create exceptional gear for yourself and others in Guild Wars 2.

pathfinder pdf

Pathfinder is a fantasy tabletop RPG where dice rolls and player choices shape the story. PDF resources provide essential rules, adventures, and tools for players and GMs, offering convenience, accessibility, and a wealth of content in a digital format.

1.1 What is Pathfinder?

Pathfinder is a fantasy tabletop role-playing game (RPG) created by Paizo, using the d20 system. Players create characters to explore Golarion, a richly detailed world, engaging in storytelling, strategic combat, and collaborative adventures. PDF resources provide essential rules, adventures, and tools, making it accessible for both players and Game Masters to enhance their gaming experience.

1.2 Importance of PDF Resources in Pathfinder

PDF resources are vital for Pathfinder, offering comprehensive guides, rulebooks, and adventures. They provide easy access to character creation tools, spells, and equipment, enhancing gameplay. Official and community-generated PDFs ensure players and GMs stay updated with the latest content, making them indispensable for both new and experienced participants in the game.

Official Pathfinder PDF Sources

Pathfinder Infinite, Archives of Nethys, and Pathfinder Nexus are the primary sources for official Pathfinder PDFs. They provide rulebooks, adventures, and tools, ensuring access to authentic and comprehensive content for players and GMs.

2.1 Pathfinder Infinite: The Official Community Content Marketplace

Pathfinder Infinite is the official marketplace for community-created content, allowing publishers to sell adventures, rules, fiction, and more set in the Golarion universe. This platform fosters creativity and innovation, offering a wide range of digital resources that expand the Pathfinder experience for both players and Game Masters.

2.2 Archives of Nethys: Free Online Resources

Archives of Nethys provides free online resources for Pathfinder, including the official Pathfinder Players Guide and the Second Edition System Reference Document (SRD). This comprehensive platform offers easy access to rules, spells, and tools, making it an invaluable resource for both new and experienced players to learn and enjoy the game.

2.3 Pathfinder Nexus: Digital Toolset and Resources

Pathfinder Nexus is Paizo’s official digital platform, offering a suite of tools and resources to enhance gameplay. It provides character builders, digital rulebooks, and adventure modules, streamlining both player and GM experiences. With regular updates and new content, Pathfinder Nexus is a must-have for anyone looking to elevate their Pathfinder Second Edition journey.

Core Rulebooks and Guides

The Pathfinder Core Rulebook (Second Edition) provides a comprehensive guide to rules, ancestries, classes, and gameplay mechanics. The Pathfinder Primer offers a free, condensed version for newcomers, while the Pathfinder Players Guide and character sheets serve as essential tools for creating and managing characters.

3.1 Pathfinder Core Rulebook (Second Edition)

The Pathfinder Core Rulebook (Second Edition) is a comprehensive guide offering detailed rules, ancestries, classes, and gameplay mechanics. It includes essential tools for both players and Game Masters, featuring character creation options, spell lists, and world-building elements. This definitive resource is crucial for immersive and dynamic Pathfinder Second Edition campaigns, ensuring endless adventure possibilities.

3.2 Pathfinder Primer: A Free Mini Core Rulebook

The Pathfinder Primer is a free mini core rulebook that introduces players to the game’s basics. It includes essential rules, ancestries, and classes in a concise format, making it ideal for newcomers. Available on Pathfinder Nexus, the Primer serves as a perfect starting point for learning the fundamentals of Pathfinder Second Edition.

3.3 Pathfinder Players Guide and Character Sheets

The Pathfinder Players Guide provides comprehensive tools for character creation, including ancestries, backgrounds, and classes. It complements the Core Rulebook with additional options and customization. Official character sheets are also available, offering organized layouts for tracking stats, skills, and equipment. These resources ensure players have everything needed to craft unique and detailed characters.

Community-Generated Content

Community-generated content expands Pathfinder’s universe through fan-created PDFs and supplements. Pathfinder Infinite offers official adventures and rules, while fan-made content adds unique twists and characters to the game.

4.1 Pathfinder Infinite: Community-Created Adventures and Rules

Pathfinder Infinite is the official marketplace for community-created content, offering adventures, rules, and accessories set in the Golarion universe. Creators can publish their own works, from unique character options to full campaigns, all available in PDF format for easy accessibility and integration into your Pathfinder games.

4.2 Fan-Made PDFs and Supplements

Fan-made PDFs and supplements expand Pathfinder’s universe with unique adventures, character options, and rules created by enthusiasts. These community-driven resources often include innovative mechanics, such as Eventide’s monster-focused expansions or The Bestiary of Passion. While unofficial, they offer fresh perspectives and tools, enriching gameplay for both players and GMs. Compatibility varies, so always review content carefully.

4.4 Pathfinder Society and Organized Play Resources

Pathfinder Society and Organized Play resources provide structured campaigns and scenarios, enabling players to join global adventures. These PDFs include pre-generated characters, exclusive adventures, and tools for tracking progress. Officially endorsed content ensures balanced gameplay, while organized play rules support community engagement and competitive fun for both players and GMs.

Adventures and Modules

Pathfinder Adventure Path and standalone modules offer epic campaigns and shorter scenarios. Explore diverse storylines, from the “Age of Ashes” to other thrilling series, expanding your game with detailed PDF resources.

5.1 Pathfinder Adventure Path

The Pathfinder Adventure Path series delivers epic, multi-part campaigns that span entire story arcs. Each installment includes detailed encounters, NPCs, and world-building elements. Popular series like “Age of Ashes” and “Extinction Curse” offer rich narratives for players of all levels, providing hours of immersive gameplay and storytelling.

5.2 Pathfinder Modules and Scenarios

Pathfinder Modules are self-contained adventures designed for specific levels, offering unique settings and challenges. Scenarios like “The Dragon’s Demand” and “We B4 Goblins” provide shorter, flexible stories. These PDFs include maps, NPCs, and encounters, perfect for GMs seeking quick, engaging sessions or side quests to enrich their campaigns.

5.3 Age of Ashes and Other Popular Adventures

The Age of Ashes is a flagship Adventure Path for Pathfinder 2nd Edition, spanning six parts and exploring themes of heroism and rebellion. Other popular adventures include Extinction Curse and Tyrant’s Grasp, offering unique stories, character options, and monster stats. These PDFs provide immersive, ready-to-play campaigns with detailed maps and encounters.

Character Creation and Customization

Pathfinder PDFs provide extensive resources for crafting unique characters, offering detailed options for ancestries, backgrounds, classes, and customization, enabling players to create personalized and complex characters.

6.1 Ancestries, Backgrounds, and Classes

Pathfinder PDFs offer detailed ancestries, backgrounds, and classes, allowing players to craft unique characters. From versatile humans to magical elves, each ancestry provides distinct traits. Backgrounds add depth with personalized histories, while classes define roles, offering diverse playstyles. These elements combine to create rich, customizable characters, enhancing storytelling and gameplay.

6.2 Feats, Skills, and Equipment

Feats, skills, and equipment are essential for shaping Pathfinder characters. Feats grant special abilities, skills define expertise, and equipment provides tools for adventures. Official PDFs like the Core Rulebook detail these elements, while platforms like Archives of Nethys offer accessible resources, enhancing customization and gameplay for both players and GMs.

6.3 Pre-Generated Characters and Iconics

Pre-generated characters and iconic personalities streamline character creation. Official Pathfinder PDFs provide iconic characters like Valeros and Seoni, offering ready-to-play options. These resources, available on platforms like Pathfinder Nexus, allow new players to dive into adventures quickly while showcasing diverse ancestries, classes, and backgrounds, enriching the storytelling experience for everyone at the table.

Digital Tools and Platforms

Pathfinder Infinite, Archives of Nethys, and Pathfinder Nexus offer digital tools, resources, and platforms that enhance gameplay, providing access to adventures, rules, and character-building aids.

7.1 Pathfinder Nexus: Official Digital Platform

Pathfinder Nexus is the official digital platform offering tools for players and GMs, including character builders, digital rulebooks, and adventure modules. It supports both Pathfinder editions, enabling seamless gameplay organization. The platform also integrates with Foundry Virtual Tabletop, enhancing online play experiences.

7.2 Archives of Nethys: Online Compendium

Archives of Nethys is a free online resource providing comprehensive access to Pathfinder rules, character options, and adventures. It includes the official Second Edition System Reference Document, player guides, and tools for both players and GMs, making it an invaluable hub for quick access to Pathfinder content.

7.3 Third-Party Tools for PDF Management

Third-party tools enhance Pathfinder PDF organization and accessibility. Platforms like DriveThruRPG offer digital libraries, while apps like PDF organizers and viewers provide enhanced search and annotation features. These tools streamline gameplay, allowing players and GMs to easily access and manage their Pathfinder resources efficiently.

Pathfinder Second Edition Remastered

Pathfinder Second Edition Remastered introduces updated rules, streamlined gameplay, and enhanced character customization, offering a refined experience for players and GMs alike.

8.1 Changes and Updates in the Remastered Edition

The Pathfinder Second Edition Remastered introduces streamlined rules, clarifications, and improvements to character creation, gameplay, and world-building. It enhances compatibility with existing content while addressing feedback, ensuring a more balanced and engaging experience for players and GMs. New updates include refined class features, expanded ancestries, and updated spellcasting guidelines.

8.2 Transitioning from First to Second Edition

Transitioning from Pathfinder First Edition to Second Edition involves adapting to a revised ruleset, including changes to character creation, combat mechanics, and spellcasting. Players and GMs can use conversion guides and resources to smoothly integrate existing characters and campaigns into the new system, ensuring continuity while embracing improved gameplay.

8.3 Using Remastered Content in Your Games

The remastered edition of Pathfinder offers streamlined rules and enhanced clarity, making it easier to integrate into existing campaigns. GMs can blend new content with classic adventures, updating mechanics while preserving beloved stories. Players benefit from refined character creation and balanced gameplay, ensuring a seamless transition and enriched storytelling experience.

Pathfinder PDFs for Beginners

Pathfinder PDFs for Beginners provide a gateway to the game with free starter resources and guides. These include the Pathfinder Primer, pre-generated characters, and essential rules, making it easy for new players to learn and dive into the world of Golarion with confidence.

9.1 Free Starter Resources

Pathfinder offers free starter PDFs, including the Pathfinder Primer, a mini core rulebook, and the Pathfinder Second Edition System Reference Document (SRD). These resources provide essential rules, character creation guides, and pre-generated characters, making it easy for new players to learn and start their adventure in the world of Golarion.

9.2 Learning the Basics of Pathfinder

Start with the Pathfinder Primer and Second Edition SRD for foundational rules. Understand character creation by exploring ancestries, backgrounds, and classes. Learn key mechanics like skills, feats, and spellcasting. Online tutorials and community guides offer step-by-step explanations, helping newcomers grasp the game’s intricacies and prepare for their first adventure.

9.3 Essential PDFs for New Players

New players should start with the Pathfinder Core Rulebook for comprehensive rules. The Pathfinder Primer offers a free, condensed guide to basics. Download the official Player Character Sheet for organizing your character. The Pathfinder Beginners Box provides a gentle introduction, while the Bestiary and Player Companion expand your options for monsters and character customization.

Advanced Resources and Strategy Guides

For experienced players, advanced Pathfinder PDFs include detailed Bestiaries, expansive rule expansions, and strategic guides. These resources enhance gameplay with complex monsters, advanced spells, and expert tips for GMs and players alike.

10.1 Bestiaries and Monster Variants

Pathfinder PDFs offer extensive Bestiaries filled with classic monsters and variant creatures. These resources provide detailed stats, abilities, and customization options, allowing GMs to craft unique encounters. Monster variants add depth, ensuring no two battles feel the same. Additionally, these PDFs often include tools for creating custom creatures, enhancing gameplay versatility and imagination for both players and GMs.

10.2 Magic Items, Spells, and Advanced Rules

Pathfinder PDFs deliver comprehensive guides for magic items, detailed spell descriptions, and advanced gameplay mechanics. These resources include crafting rules, item properties, and spellcasting strategies, enabling players and GMs to enhance their campaigns with powerful magical elements. Advanced rules expand character and world-building possibilities, offering fresh ways to tailor adventures and optimize gameplay experiences.

10.3 GM Guides and Adventure Design Tips

GM guides in Pathfinder PDFs offer expert advice on crafting compelling narratives, balancing encounters, and managing player dynamics. These resources include tips for creating immersive worlds, designing engaging NPCs, and structuring adventures. They also provide tools for customizing scenarios, ensuring every game is unique and tailored to the players’ preferences and strengths.

Pathfinder PDFs have revolutionized tabletop gaming by offering extensive resources and updates. Their digital format ensures easy access, enhancing the gaming experience. With new content and tools emerging, players and GMs can stay updated and engaged in the ever-evolving world of Pathfinder;

11.1 The Future of Pathfinder PDFs

The future of Pathfinder PDFs promises innovation and expansion, with frequent updates, new content, and enhanced digital tools. Community-driven platforms like Pathfinder Infinite will continue to thrive, offering fresh adventures and rules. As technology advances, PDFs will remain a cornerstone of the Pathfinder ecosystem, ensuring accessibility and enriching the gaming experience for all players.

11.2 Staying Updated with the Latest Releases

To stay updated with the latest Pathfinder PDF releases, explore platforms like Pathfinder Infinite, Archives of Nethys, and Pathfinder Nexus; These official and community-driven resources offer new adventures, rules, and tools regularly. Subscribe to newsletters, follow official announcements, and engage with the Pathfinder community to ensure you never miss exciting updates and expansions.

music theory for dummies pdf

Music Theory For Dummies provides a friendly, unintimidating guide to understanding music fundamentals. Perfect for beginners, it covers notes, scales, rhythm, and harmony in an accessible way.

1.1 What is Music Theory?

Music theory is the study of music’s language and practices. It involves notes, scales, rhythm, and harmony, offering the foundation for composing, performing, and understanding music. This knowledge enhances creativity and appreciation, making it essential for musicians and enthusiasts alike to master for effective musical expression.

1.2 Why is Music Theory Important?

Music theory is crucial as it provides the tools to read, write, and understand music. It enhances creativity, improves performance, and deepens appreciation, allowing musicians to communicate effectively and explore new musical possibilities with confidence and precision.

1.3 How to Get Started with Music Theory

Start with the basics: understand notes, rests, and rhythm. Use resources like Music Theory For Dummies for clear explanations. Practice regularly using exercises and online tools to build familiarity and confidence in musical concepts and notation.

The Basics of Music Notation

Master the fundamentals of music notation, including notes, rests, staff, clefs, and time signatures. These elements form the foundation for reading and writing sheet music effectively.

2.1 Understanding Notes and Rests

Notes and rests are the building blocks of music. Notes represent sounds, with pitch and duration, while rests indicate silence. Understanding their values and symbols is crucial for reading sheet music and grasping rhythm effectively in music theory.

2.2 The Staff, Clefs, and Time Signatures

The staff consists of five lines and four spaces, with clefs indicating pitch. Time signatures reveal rhythm and meter, guiding note durations and beats per measure. Understanding these elements is essential for interpreting sheet music accurately in music theory.

2.3 How to Read Sheet Music

Reading sheet music involves understanding notes, clefs, time signatures, and dynamics. Notes on the staff indicate pitch and duration, while clefs (treble or bass) specify the pitch range. Time signatures dictate rhythm, and dynamics (loud/soft) guide expression. Articulation marks further refine how notes are played, helping musicians interpret the composer’s intent accurately.

Scales and Modes

Scales and modes are foundational elements in music, defining the sequence of pitches used in melodies and harmonies. Major and minor scales create distinct moods, while modes offer variations of these scales, expanding musical expression and complexity, as explained in the “For Dummies” guide.

3.1 Major and Minor Scales

Major scales create a bright, happy sound, while minor scales produce a somber, melancholic feel; Both consist of seven notes with specific whole and half-step intervals. The “For Dummies” guide simplifies learning these scales, essential for composing and understanding music, with clear examples and exercises to master them effectively.

3.2 The Difference Between Scales and Modes

Scales are fixed sequences of notes, while modes are variations of scales starting on different pitches. The “For Dummies” guide explains how modes derive from scales, offering a clear distinction and practical examples to help musicians understand and apply these concepts in composition and improvisation effectively.

3.3 Practicing Scales for Better Understanding

Regular practice of scales enhances your understanding of music theory, aiding in composition and improvisation. Start slowly, then gradually increase speed, using a metronome for accuracy. Applying scales to real music examples makes practice engaging and effective.

Rhythm and Timing

Rhythm and timing are fundamental to music, governing how notes flow. Understanding tempo, dynamics, and time signatures helps master the essential pulse and structure of music.

4.1 Understanding Tempo and Dynamics

Tempo refers to the speed of music, while dynamics control loudness and softness. Music Theory For Dummies explains these concepts clearly, helping musicians play with accurate timing and expressive contrast, enhancing overall performance quality and emotional impact in their music.

4.2 Time Signatures and Meter

Time signatures indicate the rhythm structure, with the numerator showing beats per measure and the denominator defining note values. Meter refers to the rhythmic pulse, guiding how music is felt and played. Music Theory For Dummies simplifies these concepts, helping musicians interpret and perform with rhythmic precision and clarity.

4.3 Playing with Rhythmic Accuracy

Mastering rhythmic accuracy involves understanding time signatures, counting beats, and maintaining a steady tempo. Music Theory For Dummies offers practical exercises to improve timing, ensuring musicians play in sync with precision and confidence, whether performing solo or in an ensemble.

Intervals and Chords

Intervals are the foundation of chords, shaping harmony in music. Music Theory For Dummies simplifies understanding intervals and chord structures, helping learners master harmonic concepts effectively.

5.1 What Are Intervals?

Intervals are the distance between two pitches, forming the building blocks of chords and harmony. They can be major, minor, perfect, or diminished, and are crucial for understanding chord structures. The Music Theory For Dummies PDF guide explains intervals clearly, with examples and exercises to aid comprehension.

5.2 Building Chords from Scales

Chords are constructed from scales by stacking intervals. The Music Theory For Dummies PDF guide explains how to build triads and extended chords like major, minor, diminished, and augmented. Understanding this process is key for composing and improvising, as it reveals how harmony is derived from scales.

5.3 Common Chord Progressions

The Music Theory For Dummies PDF guide outlines popular chord progressions used in various genres. From I-IV-V-I in pop to blues sequences, these patterns are essential for composition. Understanding common progressions helps musicians create cohesive and emotionally resonant music, making them a cornerstone of harmonic structure and improvisation.

Harmony and Composition

Music Theory For Dummies explains harmony as the combination of multiple pitches, creating depth in music. It guides on composing melodies and using chords to build structured, emotionally engaging pieces.

6.1 Understanding Harmony in Music

Music Theory For Dummies simplifies harmony, explaining it as the combination of multiple pitches sounding together. It explores how chords, intervals, and key signatures create emotional depth and structure in music, essential for composition and appreciation.

6.2 How to Compose Simple Melodies

Compose simple melodies by starting with major scales, using steps and skips, and maintaining steady rhythms. Focus on key signatures, like C major, to avoid accidentals. Create memorable motifs, incorporate rests for natural flow, and end with cadences on the tonic for finality. Keep the range within an octave for singability and simplicity.

6.3 Using Chord Progressions in Composition

Chord progressions form the harmonic foundation of a piece. Start with common progressions like I-IV-V-I, experimenting with variations. Use chord charts or lead sheets for reference. Limit chord changes for simplicity and consider substitutions for variety. Always resolve progressions to create a satisfying conclusion.

Musical Form and Structure

Musical form refers to the organization of a piece, such as verse-chorus or binary form. Structure involves repetition, contrast, and development of themes, creating a cohesive composition.

7.1 Common Musical Forms

Common musical forms include sonata, rondo, and verse-chorus structures. These forms provide frameworks for composition, helping musicians organize ideas cohesively. Understanding these structures enhances both creation and appreciation of music, as explained in Music Theory For Dummies.

7.2 Understanding Verse-Chorus Structure

The verse-chorus structure is a popular musical form where verses tell a story or develop ideas, while choruses provide a memorable, repetitive hook. This structure, widely used in modern music, creates contrast and unity, making songs engaging and easy to follow, as detailed in Music Theory For Dummies.

7.3 Analyzing Musical Patterns

Analyzing musical patterns involves identifying repeating elements like melodies, rhythms, and chord progressions. This process helps in understanding a song’s structure and emotional impact. Music Theory For Dummies provides practical exercises to recognize and interpret these patterns effectively, enhancing both composition and appreciation skills for musicians and enthusiasts alike.

Resources for Learning Music Theory

Discover essential resources like books, online tools, and PDF guides to master music theory. “Music Theory For Dummies” offers a comprehensive yet accessible approach for learners of all levels.

8.1 Best Books for Beginners

Music Theory For Dummies by Michael Pilhofer and Holly Day is a top recommendation. It provides a clear, approachable introduction to music theory basics, including notes, scales, and rhythm.

8.2 Online Tools and Apps

Enhance your learning with online tools like musictheory.net and apps such as Tenuto. These resources offer interactive lessons, exercises, and quizzes, complementing the Music Theory For Dummies PDF guide for a well-rounded understanding of musical concepts.

8.3 Practice Exercises and Worksheets

Reinforce your understanding with practice exercises and worksheets from the Music Theory For Dummies PDF. These resources cover note reading, chord progressions, and rhythm, providing hands-on experience to master key concepts and apply theoretical knowledge practically.

Common Mistakes to Avoid

Common mistakes include misunderstanding note values, ignoring rhythmic accuracy, and overcomplicating chord progressions. These errors can hinder progress, so it’s essential to practice fundamentals consistently and seek clarity when needed.

9.1 Misunderstanding Note Values

Misunderstanding note values is a common mistake. Notes like whole, half, and quarter notes have specific durations. Confusing them leads to rhythmic errors. Music Theory For Dummies PDF guides clarify these concepts with clear examples, ensuring learners grasp timing accurately and avoid performance mistakes.

9.2 Ignoring Rhythmic Accuracy

Ignoring rhythmic accuracy can lead to poor timing and off-beat performances. Music Theory For Dummies PDF emphasizes understanding note values and rests to maintain rhythm. Practicing with exercises ensures precise timing, essential for both instrumentalists and composers to deliver polished musical pieces.

9.3 Overcomplicating Chord Progressions

Overcomplicating chord progressions can hinder creativity and clarity. The Music Theory For Dummies PDF advises focusing on simple, functional harmonies before exploring complex structures. This approach ensures compositions remain coherent and engaging, making it easier for listeners to connect with the music emotionally and intellectually.

The Role of the ‘For Dummies’ Series

The ‘For Dummies’ series simplifies complex topics like music theory into approachable, easy-to-understand content. Its friendly tone and clear explanations make learning accessible for beginners and casual learners alike.

10.1 Overview of the Music Theory for Dummies Book

Music Theory For Dummies offers a comprehensive guide to music fundamentals, covering notes, scales, rhythm, and harmony. Its approachable style makes complex concepts easy to grasp. Perfect for beginners and casual learners, the book provides clear explanations, practical examples, and exercises. The PDF version enhances accessibility, allowing learning on the go with convenience and flexibility.

10.2 Benefits of Using the PDF Version

The PDF version of Music Theory For Dummies offers enhanced accessibility and convenience. It allows users to learn anytime, anywhere, with easy navigation and search functionality. The digital format is ideal for quick reference and study on multiple devices, making music theory education more flexible and efficient for all learners.

10.3 How the Book Simplifies Complex Concepts

Music Theory For Dummies breaks down intricate concepts into clear, digestible content. Using friendly language, practical examples, and a logical structure, it transforms complex ideas into accessible lessons, ensuring readers grasp fundamentals without feeling overwhelmed.

Advanced Topics in Music Theory

Music Theory For Dummies delves into advanced concepts like modulation, counterpoint, and complex chord structures, offering clear explanations and practical examples to enhance understanding.

11.1 Exploring Modulation and Key Changes

Modulation, or key change, is a powerful technique in music. Music Theory For Dummies explains how to smoothly transition between keys using pivot chords, ensuring musical coherence and emotional impact in compositions; This advanced topic is made accessible through clear examples and practical exercises.

11.2 Understanding Counterpoint

Counterpoint involves interweaving multiple melodies into a cohesive musical texture. Music Theory For Dummies simplifies this complex concept with clear examples, exploring how independent melodic lines interact harmoniously. This section is invaluable for composers and musicians seeking to enhance their understanding of polyphonic music and its emotional depth.

11.3 Advanced Chord Structures

Advanced chord structures go beyond basic triads, incorporating extended intervals like 7ths, 9ths, and 11ths. Music Theory For Dummies explains these complex chords with clarity, offering practical examples and exercises to enhance your musical compositions and improvisations, making intricate harmonies accessible for both learners and seasoned musicians.

Final Thoughts and Next Steps

Music Theory For Dummies equips you with essential tools to enhance your musical journey. Use its practical insights to refine your skills, explore composition, and deepen your appreciation of music, ensuring a lifelong connection to the art of sound.

12.1 Applying Music Theory in Practice

Apply music theory by composing melodies, analyzing songs, and improvising. Music Theory For Dummies provides exercises and examples to help you translate concepts into practical skills, making music creation and interpretation intuitive and enjoyable for all skill levels.

12.2 Continuing Your Musical Journey

Continue your journey by exploring advanced topics like chord progressions and modulation. Music Theory For Dummies offers resources, exercises, and clear explanations to deepen your understanding, helping you grow from a beginner to a skilled musician with confidence and creativity.

12.3 Staying Motivated and Inspired

Stay motivated by setting achievable goals and celebrating progress. Engage with online communities, practice regularly, and explore diverse genres. Music Theory For Dummies provides inspiration and resources to keep you excited about learning and creating music, ensuring your journey remains fulfilling and enjoyable.

gevi ice maker manual

Welcome to the Gevi Ice Maker Manual! This guide helps you efficiently produce nugget ice‚ with easy operation and self-cleaning features. Follow these steps for optimal performance and maintenance.

Discover how to unbox‚ set up‚ and operate your Gevi Ice Maker. Learn about its key features‚ maintenance tips‚ and troubleshooting solutions to ensure long-lasting functionality and fresh ice production.

Unboxing and Initial Setup

Ensure the drain hoses are sealed and hung. Plug into a 120V/60Hz outlet. Open the lid‚ and keep the ice maker upright for at least 2 hours before first use.

Step-by-Step Unboxing Process

Carefully unpack the Gevi Ice Maker from its box‚ ensuring all components are included: the ice maker‚ ice basket‚ ice scoop‚ and user manual.

Inspect the unit for any damage during shipping and ensure all accessories are intact.

Place the ice maker on a flat‚ stable surface‚ away from direct sunlight and heat sources.

Before plugging in‚ check that the drain hoses at the back are securely sealed and properly hung for efficient water drainage.

Plug the appliance into a 120V/60Hz electrical outlet‚ ensuring it is easily accessible for future maintenance.

Open the lid and remove any packaging materials or protective covers from the interior.

Allow the ice maker to stand upright for at least 2 hours before first use to ensure proper functionality.

Familiarize yourself with the control panel and buttons for operation.

By following these steps‚ you can ensure a smooth and safe unboxing experience for your Gevi Ice Maker.

Operating Instructions

Press the On/Off button‚ ensure the water reservoir is filled‚ and select your preferred ice size. The ice maker will begin producing fresh nugget ice in about 15-20 minutes.

Before First Use

Before using your Gevi Ice Maker for the first time‚ ensure it has been upright for at least 2 hours to allow the refrigerant to settle. Place the unit on a flat‚ dry surface away from direct sunlight and heat sources. Plug the ice maker into a 120V/60Hz wall outlet. Remove any protective tape and wash the ice basket and scoop with warm‚ soapy water. Rinse thoroughly and dry before first use. Fill the water reservoir with clean‚ cold water to the recommended level using the provided scoop. Avoid overfilling to prevent spillage. Allow the unit to cool by pressing the On/Off button and waiting for the indicator light to glow. This ensures optimal performance for your first ice-making cycle.

Starting the Ice Maker

To start your Gevi Ice Maker‚ ensure it is properly set up and the water reservoir is filled to the recommended level. Press the On/Off button located on the control panel. The ice-making process will begin automatically. The Making indicator will glow white once the machine starts operating. Allow approximately 20 minutes for the first batch of ice to be produced. The ice maker will automatically stop once the ice basket is full. For optimal performance‚ keep the unit upright and avoid tilting it during operation. If the machine does not start‚ check that it is properly plugged in and that the water level is adequate. Regularly monitor the water level to ensure continuous ice production. Always refer to the manual for specific instructions tailored to your model.

Key Features and Benefits

The Gevi Ice Maker offers automatic water refill‚ self-cleaning functionality‚ and portable design. It produces nugget ice quickly‚ with a self-cleaning feature for easy maintenance and fresh ice every time.

Special Features of the Gevi Ice Maker

The Gevi Ice Maker is equipped with an automatic water refill system‚ ensuring continuous ice production and minimizing the need for manual intervention. Its self-cleaning function simplifies maintenance‚ removing impurities and keeping the unit fresh. Designed for portability‚ the ice maker is compact and lightweight‚ making it ideal for countertops or small spaces. The device also features a user-friendly interface with an On/Off button and an indicator light that signals when ice is ready. Additionally‚ the ice maker operates quietly and efficiently‚ producing nugget ice in approximately 15-20 minutes. Its sleek and modern design complements any kitchen decor‚ while its energy-efficient performance ensures cost-effective operation. These features make the Gevi Ice Maker a practical and convenient addition to any home or office setting.

Maintenance and Cleaning

Regularly clean the Gevi Ice Maker to ensure optimal performance. Use a soft cloth and mild detergent to wipe surfaces. Avoid harsh chemicals or abrasive materials that may damage components. Descale periodically to prevent mineral buildup and maintain efficiency. Always unplug the unit before cleaning for safety. Follow the manual’s guidelines for self-cleaning cycles and routine maintenance to extend the product’s lifespan and keep it functioning effectively.

Regular Cleaning Routine

To maintain your Gevi Ice Maker’s performance‚ establish a regular cleaning routine. Start by unplugging the unit for safety. Wipe the exterior with a soft‚ damp cloth to remove dust and spills. For the interior‚ mix a solution of equal parts water and white vinegar‚ then pour it into the water reservoir. Run a cleaning cycle or let it soak for 30 minutes to dissolve mineral deposits. After draining‚ rinse thoroughly with fresh water to eliminate any vinegar taste. Clean the ice basket and scoop with mild soap and warm water‚ then dry completely before replacing. For tougher stains or scaling‚ descale the machine as recommended in the manual. Regular cleaning prevents bacteria growth and ensures fresh-tasting ice. Additionally‚ empty and dry the water reservoir when not in use to avoid mold buildup; Always avoid harsh chemicals or abrasive cleaners to protect the unit’s finish and components.

Troubleshooting Common Issues

If your Gevi Ice Maker isn’t functioning properly‚ check for common issues and solutions. First‚ ensure the unit is properly plugged into a 120V/60Hz outlet and the power button is turned on. If the ice maker doesn’t produce ice‚ verify that the water reservoir is filled and the water supply is not restricted. Check for blockages in the ice chute or drain hose. If the machine is noisy‚ ensure it is placed on a stable‚ level surface. For irregular ice formation‚ clean the machine thoroughly and descale if necessary. If the “Making” indicator is not glowing‚ restart the device or reset it by unplugging and replugging. Regular cleaning and maintenance can help prevent many of these issues. Always refer to the manual for specific troubleshooting steps to ensure optimal performance and longevity of your Gevi Ice Maker.

Safety Precautions

Always follow safety guidelines when using your Gevi Ice Maker to ensure safe and efficient operation. Keep the appliance upright for at least 2 hours before first use and after moving it to prevent damage. Place the ice maker on a flat‚ dry surface away from heat sources‚ direct sunlight‚ and flammable materials. Avoid using sharp tools or abrasive cleaners‚ as they may damage the finish or internal components. Never submerge the unit in water or expose it to excessive moisture. Keep children away from the appliance and ensure they do not play with it. Do not modify or tamper with the ice maker‚ as this may cause electrical hazards. Regularly inspect the power cord and plug for damage. If you notice any malfunction‚ unplug the device immediately and contact customer support. Adhering to these precautions ensures safe and reliable performance of your Gevi Ice Maker.

Warranty and Customer Support

Your Gevi Ice Maker is backed by a comprehensive warranty that covers manufacturing defects for a specified period‚ ensuring any issues from faulty materials or workmanship are promptly addressed. The user manual provided with your purchase includes detailed warranty terms for your reference. Gevi offers dedicated customer support to assist with any questions or concerns. You can reach their support team via phone‚ email‚ or through the official website. The user manual is an excellent resource for troubleshooting common issues‚ but if further assistance is needed‚ the customer support team is available to help. Gevi is committed to providing top-notch service to ensure your satisfaction with their products.

With the Gevi Ice Maker Manual‚ you are now fully equipped to enjoy fresh‚ nugget-style ice in the comfort of your home. This guide has walked you through unboxing‚ setup‚ operation‚ and maintenance‚ ensuring you get the most out of your appliance. The Gevi Ice Maker is designed for ease of use‚ with features like self-cleaning and automatic water refill‚ making it a convenient addition to your kitchen. Regular maintenance and proper care will extend its lifespan and performance. Should you encounter any issues‚ the troubleshooting section and warranty support are here to help. Enjoy the convenience of fresh ice anytime with your Gevi Ice Maker!

developing number knowledge wright pdf

Understanding number knowledge is foundational for mathematical proficiency. This book by Robert J. Wright, David Ellemor-Collins, and Pamela D. Tabor provides evidence-based strategies for teaching number concepts to 7-11 year olds, emphasizing computational fluency and foundational skills. It offers practical resources, including PDF guides, to support teachers in fostering mathematical understanding and addressing learning gaps effectively.

1.1 Overview of the Book and Its Importance

Developing Number Knowledge by Robert J; Wright, David Ellemor-Collins, and Pamela D. Tabor is a comprehensive guide for teaching number concepts to children aged 7-11. It emphasizes computational fluency, place value, and early algebraic reasoning, supported by research and practical resources. The book is part of the Mathematics Recovery series, offering detailed pedagogical strategies and tools for classroom and intervention settings, making it an essential resource for educators.

1.2 Key Concepts in Number Knowledge Development

Key concepts include structuring numbers 1 to 20, understanding number words and numerals, and developing place value. Mental and written computation methods are emphasized, along with fractions and early algebraic reasoning; These foundational skills are essential for building computational fluency and mathematical sophistication, ensuring students progress confidently in their numerical understanding and problem-solving abilities.

Assessment of Number Knowledge in Children

Assessment methods evaluate children’s understanding of number concepts, identifying gaps and informing instruction. Wright’s strategies help teachers pinpoint learning challenges and tailor interventions effectively for student progress.

2.1 Methods for Evaluating Number Understanding

Effective assessment involves observing children’s problem-solving strategies and using diagnostic interviews. These methods help gauge understanding of number concepts like place value and mental computation, ensuring accurate identification of learning gaps and strengths.

2.2 Identifying Gaps in Number Knowledge

Identifying gaps in number knowledge involves assessing understanding of key concepts like place value, number words, and computation methods. Diagnostic interviews and task-based observations reveal specific areas where children struggle, such as fractions or mental math. These insights guide targeted interventions, ensuring personalized support to address learning difficulties and build a stronger foundation in number skills.

Structured Teaching Approaches

Structured teaching approaches are essential for developing number knowledge, emphasizing explicit instruction and scaffolding to build a strong numerical foundation in children.

3.1 Pedagogical Strategies for Number Instruction

Pedagogical strategies in number instruction focus on structured, evidence-based methods. These include explicit teaching, scaffolding, and the use of visual aids like number lines and place value charts. Teachers employ mental computation techniques, written methods, and real-world applications to enhance understanding. The Mathematics Recovery approach emphasizes differentiation, ensuring personalized learning for diverse student needs, fostering mathematical fluency and conceptual understanding.

3.2 The Role of Place Value in Number Development

Place value is a cornerstone of number development, enabling students to understand the structure of numbers. It begins with single-digit numbers and progresses to multi-digit concepts, where each digit represents tens, hundreds, or thousands. This foundational knowledge is crucial for mental and written computation, allowing students to decompose and reconstruct numbers flexibly. Teaching place value involves manipulatives, visual models, and real-world examples to build a robust mathematical framework.

Intervention Strategies for Number Development

Targeted interventions focus on addressing gaps in number understanding through structured, small-group instruction and personalized learning plans, ensuring foundational skills are securely developed for long-term math proficiency.

4.1 Targeted Interventions for 7-11 Year Olds

Targeted interventions for this age group focus on addressing specific gaps in number understanding. Strategies include small-group instruction, personalized learning plans, and the use of structured resources like black line masters and online materials. These interventions emphasize foundational concepts such as place value, fractions, and mental computation, ensuring students build a robust numerical foundation for future math proficiency and problem-solving skills.

4.2 Classroom and Small-Group Instruction Techniques

Classroom and small-group instruction techniques involve structured, interactive activities to enhance number understanding. Teachers use visual aids like number lines and base-ten blocks to demonstrate concepts. Group work and peer discussions encourage collaborative learning, while targeted questioning and formative assessments monitor progress. These methods support personalized learning, ensuring all students engage with key number concepts and develop computational fluency effectively, addressing diverse learning needs and pacing.

Core Number Concepts and Skills

This section explores foundational number concepts, including structuring numbers 1 to 20, knowledge of number words, place value, mental computation, fractions, and early algebraic reasoning, building a strong mathematical foundation.

5.1 Structuring Numbers 1 to 20

Structuring numbers 1 to 20 involves understanding their sequence, relationships, and composition. This foundational skill helps children develop mental models for counting, basic arithmetic, and place value. Activities include number tracing, counting games, and composing/decomposing numbers, fostering a strong base for higher mathematical concepts like addition and subtraction, ensuring a smooth transition to more complex number operations and problem-solving skills in the future.

5.2 Knowledge of Number Words and Numerals

Mastery of number words and numerals is crucial for mathematical literacy. This includes recognizing and writing numbers, understanding their spoken forms, and connecting them to their symbolic representations. Activities such as matching games and number writing exercises help children build this fundamental skill, enabling them to communicate quantities effectively and transition smoothly into more complex numerical operations and problem-solving scenarios.

5.3 Mental and Written Computation Methods

Mental computation fosters quick, flexible number sense, while written methods provide structure for complex problems. Teaching both ensures students can adapt to varied situations. Mental strategies, such as decomposition and rounding, enhance fluency, while written algorithms build accuracy. Activities like mental math exercises and step-by-step problem-solving help students master these complementary skills, promoting confidence and proficiency in numerical reasoning and application.

Fractions and Early Algebraic Reasoning

Fractions are introduced through visual and real-world examples, building understanding of part-whole relationships. Early algebraic reasoning focuses on patterns, relationships, and simple equations, fostering logical thinking skills.

6.1 Introducing Fractions in the Classroom

Introducing fractions involves using visual aids and real-world examples to help students understand part-whole relationships. Teachers can use manipulatives like pies or blocks to demonstrate basic concepts. Connecting fractions to students’ prior knowledge of numbers and division fosters comprehension. Structured activities, such as comparing fractions and identifying equivalent parts, build foundational skills and prepare students for algebraic reasoning.

6.2 Building Foundations for Algebraic Thinking

Building algebraic thinking involves introducing patterns, relationships, and symbolic representations. Teachers can use number sequences and word problems to foster logical reasoning. Encouraging students to identify and extend patterns helps develop their ability to generalize mathematical concepts. Connecting number knowledge to algebraic expressions prepares students for solving complex problems and lays the groundwork for advanced mathematical reasoning skills.

Resources and Tools for Teachers

This section provides black line masters, PDF guides, and instructional materials to support teaching number knowledge. Resources are adaptable for various teaching environments, ensuring flexibility and effectiveness.

7.1 Black Line Masters and Instructional Materials

The book includes black line masters, offering versatile teaching resources. These materials support structured lessons, interventions, and small-group activities. They are adaptable for different learning needs, ensuring teachers can modify content to suit their students effectively. The resources are provided in both PDF and XPS formats to maintain formatting integrity, and MS Word versions allow for further customization to meet specific classroom requirements.

7.2 Online Resources and PDF Guides

Supplementing the book, online resources and PDF guides provide comprehensive support for teachers. These include downloadable materials for lesson planning, student activities, and assessment tools. The resources are available in PDF and XPS formats to ensure consistent formatting. Additionally, MS Word versions enable teachers to customize materials, offering flexibility for diverse teaching strategies and student needs in both classroom and intervention settings.

Classroom Applications and Case Studies

The book provides real-world examples of successful number knowledge implementation, supported by case studies. These resources help teachers apply strategies effectively, enhancing student understanding and numeracy outcomes.

8.1 Successful Implementation of Number Knowledge Strategies

Wright, Ellemor-Collins, and Tabor’s book provides evidence-based strategies for implementing number knowledge in classrooms. Teachers can use structured approaches, assessments, and resources like PDF guides to enhance learning. The book offers classroom examples and case studies, demonstrating how to apply these strategies effectively. By following these methods, educators can improve students’ numeracy skills and address individual learning needs in diverse educational settings;

8.2 Real-World Examples of Student Progress

Real-world examples in Wright’s book demonstrate significant student progress through targeted interventions. Case studies show how structured number instruction and resources, like PDF guides, have improved numeracy skills in diverse classrooms. The Mathematics Recovery approach has successfully enhanced computational fluency and conceptual understanding, with measurable gains in students’ ability to apply number knowledge in practical problem-solving scenarios, supported by classroom evidence and research data.

Effective number instruction, as outlined by Wright, leads to significant student progress. Future directions include continuing teacher development and advancing research in numeracy education to enhance outcomes.

9.1 The Impact of Effective Number Instruction

Effective number instruction, as detailed by Wright, fosters computational fluency, enhances place value understanding, and builds early algebraic reasoning skills. It equips teachers with practical tools like PDF resources and black line masters, translating to measurable student progress. This approach not only boosts academic confidence but also lays a strong foundation for future mathematical success, ensuring learners thrive in numeracy.

9.2 Continuing Professional Development for Teachers

Continuing professional development is crucial for teachers to refine their number instruction skills. Wright’s resources, including PDF guides and instructional materials, support educators in enhancing their teaching practices. By engaging in ongoing learning, teachers can stay updated on effective methodologies, ensuring they deliver high-quality number instruction and foster meaningful student progress in numeracy and mathematical thinking.

References and Further Reading

Key references include Developing Number Knowledge by Robert J. Wright, David Ellemor-Collins, and Pamela D. Tabor, published by SAGE in 2012. The e-book version is available online.

10.1 Key Research and Publications

The primary reference is Developing Number Knowledge by Robert J. Wright, David Ellemor-Collins, and Pamela D. Tabor, published by SAGE in 2012. This book provides comprehensive strategies for teaching number concepts to 7-11 year olds, supported by research and practical resources. It is part of the Mathematics Recovery series, emphasizing computational fluency and foundational skills, with accompanying PDF guides and instructional materials for teachers.

10.2 Additional Resources for Teachers

Supplemental materials include black line masters, instructional guides, and PDF resources. These tools support structured number instruction, mental computation, and place value understanding. Additional online resources, such as XPS and MS Word files, allow teachers to adapt materials for diverse learning needs. These resources are designed to complement the core strategies outlined in Developing Number Knowledge, enhancing classroom and intervention practices effectively.

stainless steel guide rod glock

Stainless steel guide rods for Glock pistols offer enhanced durability‚ improved muzzle control‚ and reduced recoil; Made from rigid materials‚ they provide superior performance and compatibility across various models.

1.1 Overview of Guide Rods in Glock Pistols

A guide rod is a critical component in Glock pistols‚ integral to the recoil system. It ensures reliable function by guiding the slide and recoil spring during cycling. Typically made from steel or polymer‚ guide rods play a vital role in controlling recoil and ensuring smooth operation. Upgrading to stainless steel enhances performance and durability‚ as seen in models like the Glock 17‚ 19‚ and 20.

1.2 Importance of Material Quality

Material quality is crucial for guide rods‚ as it directly impacts durability and performance. Stainless steel‚ being highly resistant to wear and corrosion‚ offers superior longevity compared to polymer or standard steel. Its rigidity minimizes flex‚ ensuring consistent function and accuracy in Glock pistols‚ making it a preferred choice for enthusiasts and professionals seeking reliable upgrades.

Benefits of Stainless Steel Guide Rods

Stainless steel guide rods enhance performance by reducing recoil and muzzle flip‚ improving accuracy and control during firing‚ while offering exceptional durability and reliability.

2.1 Enhanced Durability and Lifespan

Stainless steel guide rods are crafted from high-quality materials‚ offering exceptional resistance to wear and corrosion. They withstand rigorous use‚ maintaining optimal performance over time. Unlike factory parts‚ stainless steel guide rods reduce flex and minimize the risk of damage‚ ensuring a longer lifespan and consistent reliability in both training and tactical scenarios.

2.2 Improved Weight Distribution and Muzzle Control

Stainless steel guide rods enhance weight distribution by adding mass near the muzzle‚ reducing unwanted movement during firing. This results in improved muzzle control‚ minimizing flip and allowing for faster target reacquisition. The rigid design prevents flexing‚ ensuring consistent lock-up and smoother operation‚ making it ideal for competitive shooters and tactical applications where precision is critical.

2.3 Reduced Recoil and Muzzle Flip

Stainless steel guide rods significantly reduce recoil and muzzle flip by adding targeted mass near the muzzle. This extra weight stabilizes the pistol during firing‚ minimizing upward movement. Shooters can maintain better control‚ stay on target‚ and achieve faster follow-up shots. The rigid design ensures consistent performance‚ making it ideal for both competitive and self-defense scenarios where accuracy and stability are paramount.

How Stainless Steel Guide Rods Work

Stainless steel guide rods are integral to recoil management‚ ensuring smooth slide cycling and consistent weapon operation. They stabilize the pistol during firing and reload.

3.1 Components of a Guide Rod Assembly

A stainless steel guide rod assembly typically includes a guide rod‚ recoil spring‚ and spring cups. The guide rod is crafted from high-quality stainless steel‚ offering durability and resistance to wear. The recoil spring is designed to absorb and store energy during the firing cycle‚ ensuring smooth slide operation. Together‚ these components work seamlessly to enhance the pistol’s performance and reliability‚ providing consistent and accurate shooting experiences for Glock users.

3.2 Role in Recoil Management

Stainless steel guide rods play a crucial role in recoil management by minimizing flex and absorbing energy during the firing cycle. Their rigidity helps reduce muzzle flip‚ allowing for better control and faster target reacquisition. This results in smoother operation and improved accuracy‚ making them a valuable upgrade for Glock owners seeking enhanced performance and reliability in high-stress shooting scenarios.

Compatibility with Glock Models

Stainless steel guide rods are designed to fit various Glock models‚ including Gen 4‚ compact frames like the 19‚ and larger frames such as the 20 and 21.

4.1 Gen 4 Compatibility

Stainless steel guide rods are fully compatible with Gen 4 Glock models‚ including the 17‚ 19‚ and 34. These rods are engineered to work seamlessly with Gen 4’s enhanced features‚ ensuring optimal performance and reliability. Their durability and weight distribution enhance muzzle control‚ making them a popular upgrade for Gen 4 owners seeking improved accuracy and reduced recoil.

4.2 Compact and Subcompact Models

Stainless steel guide rods are compatible with Glock’s compact and subcompact models‚ such as the 19‚ 23‚ and 32. Designed for Gen 1-3‚ these rods enhance performance in smaller frames‚ offering durability and improved reliability. Their rigid construction ensures consistent operation‚ making them a preferred upgrade for concealed carry and tactical use in compact Glock pistols.

4.3 Larger Frame Compatibility

Larger frame Glocks‚ such as the 20‚ 21‚ 40‚ and 41‚ benefit from stainless steel guide rods designed for their extended slides. These rods ensure smooth recoil management and consistent lock-up‚ enhancing accuracy and control. Their durability and weight distribution make them ideal for competition and tactical shooting‚ offering a reliable upgrade for full-size Glock pistols.

Installation and Setup

Installing a stainless steel guide rod is straightforward‚ requiring disassembly of the Glock’s slide. Replace the factory rod with the new stainless steel unit‚ ensuring proper alignment; Reassemble carefully‚ then test function to confirm smooth operation and reliability.

5.1 Step-by-Step Installation Process

Begin by ensuring the Glock is unloaded and safe. Remove the barrel and recoil spring assembly from the slide. Take out the factory guide rod and replace it with the stainless steel unit. Reattach the recoil spring and reassemble the slide. Test the pistol to ensure proper function and smooth operation. Follow manufacturer instructions for precise alignment and torque specifications.

Top Brands Offering Stainless Steel Guide Rods

Ensure the Glock is unloaded. Remove the slide and barrel. Take out the recoil spring and factory guide rod. Insert the stainless steel guide rod. Reassemble the spring and slide. Test for proper function and alignment. Use a punch or wrench for precise installation. Follow manufacturer guidelines for torque specifications and safety protocols to avoid damage.

6.1 ZEV Technologies

ZEV Technologies is a renowned brand offering high-quality stainless steel guide rods for Glock pistols. Known for precision engineering‚ their guide rods enhance performance and durability. Compatible with various Glock models‚ including Gen 4 and larger frames‚ ZEV’s products are designed to improve recoil management and muzzle control. Made in the USA‚ they ensure reliability and exceptional performance for shooters seeking upgraded components.

6.2 CDS MOD2

CDS MOD2 offers stainless steel guide rod assemblies for Gen 1-3 Glock models‚ including the Glock 17. Their products are built for durability and performance‚ featuring a rigid stainless steel body that reduces guide rod flex. These assemblies are designed to enhance accuracy and control‚ making them a popular choice among Glock enthusiasts seeking reliable upgrades for their firearms.

6.3 Double Diamond

Double Diamond offers high-quality stainless steel guide rods for various Glock models‚ including the G34 Gen 5. Their extended guide rods are designed for precision and durability‚ providing enhanced recoil management. With a focus on performance and reliability‚ Double Diamond products are sought after by competitive shooters and enthusiasts looking to improve their Glock’s functionality.

6.4 Other Notable Manufacturers

Besides ZEV and CDS‚ other manufacturers like Caros and Themevale offer high-quality stainless steel guide rods. These brands provide durable‚ precision-engineered components that enhance Glock performance‚ with options for various models and generations. They ensure improved recoil management and reliability‚ catering to both competitive shooters and tactical users seeking upgraded functionality for their pistols.

User Reviews and Feedback

Users praise stainless steel guide rods for their durability and improved performance. Many report smoother action and reduced muzzle flip‚ enhancing accuracy and control during shooting sessions.

7.1 Positive Experiences

Users highlight enhanced durability and smoother operation with stainless steel guide rods. Many report reduced muzzle flip and improved accuracy‚ making them ideal for competitive shooters and law enforcement professionals.

7.2 Critical Points and Considerations

Some users note that stainless steel guide rods may add slight weight and cost. A few mention compatibility issues with certain models‚ emphasizing the need for precise fitting to avoid performance issues.

Maintenance and Care Tips

Regular cleaning and lubrication of stainless steel guide rods ensure optimal performance. Inspect for wear or damage; replace worn parts promptly to maintain reliability and functionality.

8.1 Cleaning and Lubrication

Regular cleaning and lubrication are essential for maintaining stainless steel guide rods. Use a soft cloth and mild solvent to remove debris. Apply a high-quality gun oil to moving parts to prevent corrosion and ensure smooth operation. Avoid harsh chemicals that might damage finishes. Proper lubrication enhances reliability and longevity of the guide rod assembly.

8.2 Inspection and Replacement Guidelines

Inspect stainless steel guide rods periodically for wear‚ scratches‚ or corrosion. Replace immediately if damage is detected. Signs of fatigue or excessive wear warrant replacement. Follow manufacturer guidelines for replacement intervals‚ typically every 5‚000 rounds. Ensure all components are compatible and genuine to maintain performance and reliability of your Glock pistol’s recoil system.

Is Upgrading to Stainless Steel Worth It?

Upgrading to a stainless steel guide rod enhances durability‚ reduces recoil‚ and improves muzzle control. It offers long-term reliability‚ making it a valuable investment for Glock enthusiasts seeking improved performance.

9.1 Pros of Upgrading

Upgrading to a stainless steel guide rod provides enhanced durability‚ reducing wear and tear. It minimizes flex‚ improving accuracy and recoil management. The added weight offers better muzzle control‚ resulting in smoother shooting experiences. Additionally‚ stainless steel guide rods are resistant to corrosion and require less maintenance‚ ensuring long-term reliability for your Glock pistol.

9.2 Cons to Consider

Upgrading to a stainless steel guide rod may increase costs and add weight‚ which some users find undesirable. Installation can be challenging for inexperienced shooters‚ potentially requiring professional assistance. Additionally‚ some shooters find the stock guide rod sufficient‚ making the upgrade unnecessary for their needs‚ especially if reliability and performance are already satisfactory with the factory setup.

Upgrading to a stainless steel guide rod enhances your Glock’s performance‚ offering improved durability‚ reduced recoil‚ and better muzzle control. With compatibility across various models and reputable brands like ZEV Technologies and CDS MOD2‚ it’s a worthwhile investment for shooters seeking reliability and precision. Consider your needs and budget to decide if this upgrade aligns with your shooting goals and preferences.

honeywell pro 6000 installation manual

Welcome to the Honeywell Pro 6000 Installation Manual, your guide to installing and configuring your advanced thermostat. This manual provides step-by-step instructions, safety tips, and troubleshooting solutions to ensure a smooth setup and optimal performance of your device.

1.1 Importance of the Manual for Proper Installation

The Honeywell Pro 6000 Installation Manual is essential for ensuring a safe, correct, and efficient setup. It provides detailed instructions, safety precautions, and troubleshooting tips, helping you avoid common errors and guarantee optimal performance. Follow the guide carefully to prevent damage, ensure system compatibility, and achieve proper functionality of your thermostat.

1.2 Overview of the Honeywell Pro 6000 Thermostat

The Honeywell Pro 6000 is a cutting-edge programmable thermostat designed for precise temperature control and energy efficiency. It features smart home integration, advanced zoning capabilities, and customizable settings. This thermostat supports various HVAC systems, including heating, cooling, and emergency heat, making it a versatile solution for modern home comfort and automation needs.

Pre-Installation Requirements and Preparation

Before installing the Honeywell Pro 6000, ensure you have all necessary tools and materials. Verify system compatibility and safety precautions, such as disconnecting power, to prepare for a successful installation process. Proper planning and preparation are essential to avoid complications and ensure optimal thermostat performance.

2.1 Tools and Materials Needed for Installation

To install the Honeywell Pro 6000, you’ll need a screwdriver, battery holder, and wiring tools. Ensure you have mounting screws, drywall anchors, and a voltage tester for safety. The reference card from the packaging will also be essential for programming and configuration during the setup process.

2.2 Understanding System Compatibility and Requirements

Ensure your HVAC system is compatible with the Honeywell Pro 6000. It supports single-stage, multi-stage, and heat pump systems. Verify voltage requirements (24V AC) and wiring configurations. Check if your system includes emergency heat or zoning capabilities. Match the thermostat settings to your HVAC type for proper functionality and efficient operation.

2.3 Safety Precautions Before Starting the Installation

Disconnect power to the HVAC system before installation. Wear safety gear, including gloves and goggles. Ensure proper grounding to avoid electrical shock. Handle components carefully to prevent damage. Follow all instructions and local regulations. Test systems post-installation to ensure safe operation. Never bypass safety features or skip critical steps outlined in the manual.

Wallplate and Wiring Installation

This section guides you through installing the wallplate and configuring the wiring for your Honeywell Pro 6000 thermostat, ensuring proper setup for optimal performance.

3.1 Step-by-Step Wallplate Installation Process

Begin by removing the wallplate from the thermostat. Take out the battery holder to access the wiring. Mount the wallplate securely, ensuring it is level. Follow the provided mounting instructions for precise installation. Once mounted, carefully pull the wires through the designated wire hole and connect them according to the wiring diagram. Ensure all connections are secure and tightened properly to avoid any issues during operation. Finally, replace the battery holder and reattach the wallplate to complete the installation process. This step is crucial for ensuring the thermostat functions correctly and maintains optimal performance. Always refer to the manual for specific wiring configurations to match your HVAC system requirements. Proper installation guarantees safety, efficiency, and reliability of your Honeywell Pro 6000 thermostat. If unsure, consider consulting a licensed professional to handle the wiring and mounting to prevent any potential hazards or malfunctions.

3.2 Wiring Connections and Configuration

Begin by identifying the terminal labels on the wallplate and the thermostat. Carefully connect the wires to the corresponding terminals, ensuring proper alignment with your HVAC system type. Refer to the wiring diagram provided for precise connections. For systems with emergency heat, install a field jumper between the Aux and E terminals if no emergency heat relay is present. Secure all wire connections tightly to prevent loose contacts. Double-check the wiring configuration to match your system requirements, such as heating, cooling, or dual-fuel setups. Proper wiring ensures safe and efficient operation of the thermostat. If unsure, consult a licensed electrician or the manual for detailed guidance.

3.3 Common Issues and Solutions During Wiring

Common wiring issues include loose connections, incorrect terminal assignments, and missing field jumpers for emergency heat. To resolve, ensure all wires are securely fastened and terminals match your HVAC system. For systems without an emergency heat relay, install a jumper between Aux and E terminals. If issues persist, consult the manual or contact a professional for assistance.

Thermostat Configuration and Setup

4.1 Initial Setup and Programming the Thermostat

Start by disconnecting power to your HVAC system. Remove the wallplate and battery holder, then mount the new thermostat. Insert the batteries, power on the system, and follow the on-screen prompts to set up basic configurations, including time, temperature units, and Wi-Fi settings. Program heating and cooling schedules to match your preferences, ensuring optimal comfort and energy efficiency.

4.2 Configuring the Thermostat to Match Your HVAC System

Select the correct system type (heat/cool or emergency heat) on the thermostat. Connect to Honeywell zoning panels if applicable. Install field jumpers between Aux and E for systems without an emergency heat relay. Test heating, cooling, and fan functions to ensure compatibility and proper operation with your HVAC setup.

4.3 Customizing Features for Optimal Performance

Customize your Honeywell Pro 6000 thermostat by enabling energy-saving modes, adjusting temperature ranges, and setting schedules. Utilize smart home integration for voice control and remote adjustments. Configure zoning systems and emergency heat options to optimize performance. Regularly update software for enhanced features and ensure all settings align with your HVAC system for maximum efficiency and comfort.

System Testing and Verification

Test your HVAC system’s heating, cooling, emergency heat, and fan functions after installation. Verify each operation to ensure proper performance and system compatibility, confirming a successful setup.

5.1 Testing Heating, Cooling, and Emergency Heat Systems

After installation, test the heating, cooling, and emergency heat systems to ensure proper functionality. Turn on the thermostat and verify each mode operates correctly. Check for consistent temperature control and smooth transitions between modes. Confirm the emergency heat engages when required and that all systems perform efficiently without issues.

5.2 Verifying Fan and Auxiliary Functions

Ensure the fan operates smoothly in both auto and manual modes. Test auxiliary functions like emergency heat or two-stage systems. Verify all functions activate correctly and maintain consistent performance. If issues arise, check wiring connections and consult the manual for troubleshooting steps to ensure optimal system operation.

5.3 Ensuring Proper System Operation After Installation

After installation, verify that all system components operate correctly. Test heating, cooling, and emergency heat modes to ensure proper function. Check fan operation in both auto and manual settings. Use the thermostat’s diagnostic tools to identify and address any issues promptly. This ensures reliable performance and maintains energy efficiency throughout the system.

Advanced Features and Customization

The Honeywell Pro 6000 offers advanced features like smart home integration, customizable zoning systems, and energy-saving settings to optimize performance and efficiency for your specific needs.

6.1 Smart Home Integration and Wi-Fi Setup

To integrate your Honeywell Pro 6000 with smart home systems, connect it to your Wi-Fi network. Download the Honeywell Home app, pair the thermostat, and follow in-app instructions. Ensure a stable internet connection for seamless functionality. This setup allows voice control via Google Assistant or Alexa, enhancing convenience and remote management capabilities for optimal comfort and efficiency. Use the app to customize settings and receive alerts.

6.2 Configuring Zoning Systems and Emergency Heat Options

Configure zoning systems by connecting the Honeywell Pro 6000 to compatible zoning panels. For emergency heat, install a field jumper between Aux and E terminals if no relay is present. This setup ensures proper activation of emergency heat during system failures, maintaining consistent temperatures and system reliability; Follow the manual for precise wiring and configuration steps to avoid errors and ensure safety.

6.3 Energy-Saving Features and Custom Settings

The Honeywell Pro 6000 offers advanced energy-saving features, including smart scheduling and geofencing, to optimize energy usage. Custom settings allow you to adjust temperature limits, humidity levels, and system alerts. These features help reduce energy consumption while maintaining comfort. Use the thermostat’s interface to configure these settings and ensure your HVAC system operates efficiently, lowering utility bills and extending equipment lifespan.

Troubleshooting Common Issues

Address common issues like wiring errors, display malfunctions, or system incompatibility. Refer to error codes for specific solutions. Perform system tests to verify functionality and resolve problems effectively.

7.1 Identifying and Resolving Installation Errors

Check wiring connections for loose or incorrect configurations. Verify system compatibility and ensure all components are properly installed. Refer to error codes for specific issues and follow troubleshooting steps to resolve installation-related problems. Perform a system test after repairs to confirm functionality and ensure optimal performance.

7.2 Addressing Common Operational Problems

Address issues like uneven heating/cooling or unresponsive screens by checking sensor accuracy and ensuring proper system configuration. Restart the thermostat and verify wiring connections. Consult the manual for error code solutions or contact Honeywell support for further assistance. Regular updates and maintenance can prevent recurring operational issues.

7.3 Understanding Error Codes and Solutions

Refer to the error code list in the manual to diagnose issues like E1 (temperature mismatch) or E2 (sensor fault). Solutions include checking wiring connections, restarting the thermostat, or recalibrating sensors. For persistent issues, consult the troubleshooting guide or contact Honeywell support for professional assistance. Regular software updates can resolve many error-related problems.

Maintenance and Upkeep of the Honeywell Pro 6000

Regular cleaning and inspections ensure optimal performance. Update software and firmware to maintain functionality. Schedule professional maintenance annually to check wiring and system compatibility for long-term efficiency.

8.1 Regular Cleaning and Inspection of Components

Regularly clean the thermostat’s display and components with a soft cloth to prevent dust buildup. Inspect wires for damage or wear and ensure all connections are secure. Check the wallplate and battery holder for proper alignment. Perform these checks every 6 months to maintain optimal performance and prevent potential issues.

8.2 Updating Software and Firmware

Regularly check for software and firmware updates to ensure your Honeywell Pro 6000 operates at peak performance. Download updates from the official Honeywell website or through the thermostat’s Wi-Fi connectivity. Follow on-screen instructions to install updates, ensuring the system is powered off during the process. Updates enhance features and fix bugs for optimal functionality.

8.3 Scheduling Professional Maintenance

Scheduling professional maintenance ensures your Honeywell Pro 6000 operates efficiently and safely. Regular inspections by certified technicians prevent potential issues, enhance energy efficiency, and extend the system’s lifespan. Follow manufacturer recommendations for routine checks and necessary repairs to maintain optimal performance and warranty compliance.

Congratulations on completing the Honeywell Pro 6000 installation! Ensure all systems operate correctly, verify configurations, and test performance. Proper disposal of packaging and recycling of old devices is recommended for environmental safety.

9.1 Final Verification of Installation and Configuration

After installation, test heating, cooling, emergency heat, and fan functions to ensure smooth operation. Verify thermostat configuration matches your HVAC system and all settings are correctly programmed. Check for error codes and ensure proper system operation. Confirm wiring connections are secure and the wallplate is mounted correctly. Ensure optimal performance and efficiency before finalizing the setup.

9.2 Ensuring Optimal Performance and Efficiency

Test heating, cooling, emergency heat, and fan functions to confirm proper operation. Configure energy-saving features and customize settings for your HVAC system. Regularly update software and inspect wiring connections. Ensure the thermostat is programmed correctly and matches your system requirements. Refer to the manual for advanced customization options to maximize efficiency and performance.

9.3 Disposal and Recycling Information

Contact your local waste management authority for recycling instructions. Properly dispose of the Honeywell Pro 6000 thermostat and batteries, adhering to environmental regulations. Remove batteries before disposal and consider reaching out to Honeywell support for additional guidance on responsible recycling practices.